HOME PAGE | < Previous | Contents | Next >
2.2 MAIN MACHINE INSTALLATION
2.2.1 IMPORTANT NOTICE ON SECURITY ISSUES
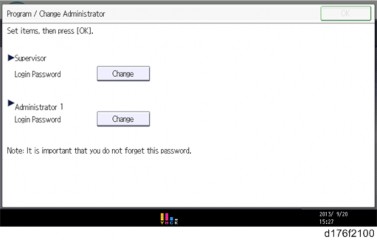
In order to increase the security of the MFP, and to ensure that the customer sets the administrator password, an administrator set/change prompt display is shown up at the first power-up.
The following Program/ Change Administrator screen is displayed at the first power-up.

When the customers set the administrator/supervisor login password, the display disappears and the home display will appear. The customers, however, can erase this screen with the following procedure in the case that they think there is no need to set the password.
1. On the Program/Change Administrator screen, press [Change] next to Supervisor and then press [OK] without inputting any password.
2. Press [OK] again when the Confirm password display shows up.
3. For Administrator 1, do the same procedure as steps 1 and 2.
4. Press the [OK] button, and then turn the power OFF/ON.
SP5-755-002 (Display Setting: Hide Administrator Password Change Scrn) allows you to skip this screen temporarily and continue the installation procedure without setting an administrator password. However, the Program/Change Administrator screen appears every time you turn the power OFF/ON, if the password is not set.
For more details about this security issue, see "Notes on Using Multi-Function Printers Safely" supplied with the MFP.
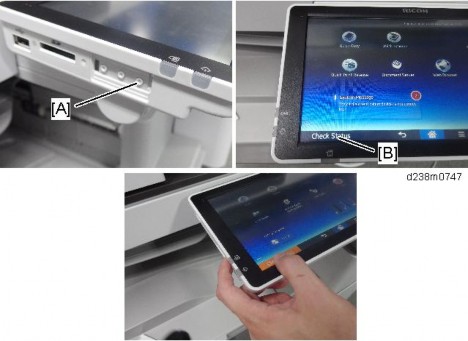
To enter the SP mode, there are two ways to display the number keyboard on screen;
1. Press the "Document Server" icon.
2. Press and hold the button [A] located at the left side of the operation panel and "Check Status [B]" at the same time.
Installation
Installation
Installation
Main Machine Installation
