HOME PAGE | < Previous | Contents | Next >
For Machines with preinstalled SPDF: Removal of protective sheet
1. Open the SPDF.
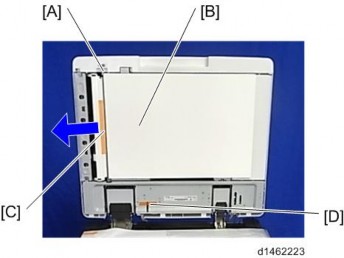
2. Release the lever [A], open the pressure plate sheet [B], and pull out the protective sheet [C] slowly.
3. Remove the filament tape [D].
4. Close the pressure plate sheet [A].
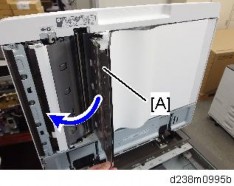
5. Close the SPDF.
If the protective sheet remains in the SPDF, a paper jam will be detected.
Removal of PCDU Seals
Automatic initial adjustment will be done even if the seal was not removed correctly. But toner from a PCDU that still has the seal will not be able to reach the ITB, and will not be transferred to printouts and copies.
If this happens, remove the PCDU seal and do SP2-111-004 (Forced Line Position Adj. Mode d).
White stripes may appear in the printed images for the first 20k pages printing continuously in a low humid environment, due to the deviation of toner density
Main Machine Installation
Installation
Installation
Installation
adjustment. Except for that, the machine operates normally.
SP descriptions
SP2-111-004 (Forced Line Position Adj. Mode d)
Executes the fine line position adjustment and rough line position adjustment.
1. Open the front cover.
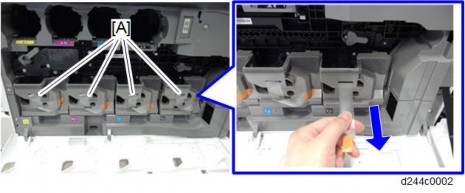
2. Pull out the seals [A] for Y, M, C, and Bk.
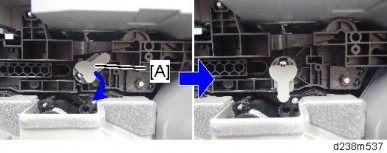
3. Rotate the ITB contact lever [A] clockwise, and set it to the position in the following picture.
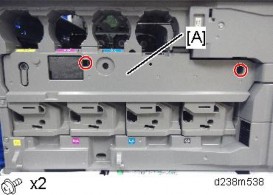
4. Attach the image transfer front cover [A] with the two screws (M3×8; provided with the accessories).
5. Close the front cover.