HOME PAGE | < Previous | Contents | Next >
Replacement and Adjustment
Replacement and Adjustment
Replacement and Adjustment
4.11 IMAGE TRANSFER UNIT
4.11.1 IMAGE TRANSFER BELT UNIT
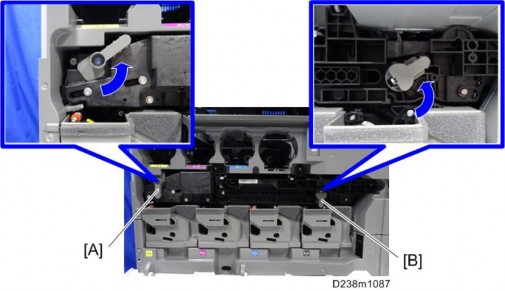
Note that if the two levers [A] [B] are not pointing up, the image transfer belt unit cannot be inserted.

Before you remove or attach the image transfer belt unit, open the right door and the paper transfer unit.

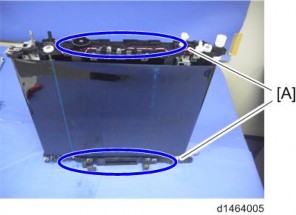
Do not touch the rollers but hold the upper/lower resin parts [A] when you lift the Image Transfer Unit. Touching the rollers may cause poor image quality.
Precautions when attaching the image transfer belt unit:
Slowly push the unit until it is inserted all the way, and then give a final strong push one more time. Then lock the ITB lock lever and ITB contact lever.
If the ITB contact lever is locked with the image transfer belt unit not fully inserted into the machine, the paper transfer roller is not set in the correct position when the