- Check the display and make sure that the overwrite erase icon appears.
- Check the overwrite erase icon.
The icon [2] is lit when there is no temporary data to be overwritten.
HDD Encryption
Before You Begin the Procedure:
- Make sure that the following settings (1) to (3) are not at the factory default settings.
- Supervisor login password
- Administrator login name
- Administrator login password
These settings must be set up by the customer before the HDD Encryption unit can be installed.
- Confirm that "Admin. Authentication" is on: [User tools/Counter] key -> [System Settings] -> [Administrator Tools] -> [Administrator Authentication Management] -> [Admin. Authentication] -> [On]
If this setting is off, tell the customer that this setting must be on before you can do the installation procedure. - Confirm that "Administrator Tools" is selected and enabled.
"Available Settings" is not displayed until step 2 is done.
If this setting is not selected, tell the customer that this setting must be selected before you can do the installation procedure.
Installation Procedure:
- Turn on the main power switch, and then enter the SP mode.
- Select SP5878-002, and then press "Execute" on the LCD.
- Exit the SP mode after "Completed" is displayed on the LCD.
- Turn off the main power switch.
Enable Encryption Setting:
- Press the [User tools/Counter] key.
- Press [System Settings].
- Press [Administrator Tools].
- Press [Machine Data Encryption Settings].If this item is not visible, press [Next] to display more settings.
- Press [Encrypt].

Installation
- Select the data to be carried over to the hard disk and not be reset. To carry all of the data over to the hard disk, select [All Data].
To carry over only the machine settings data, select [File System Data Only]. To reset all of the data, select [Format All Data].
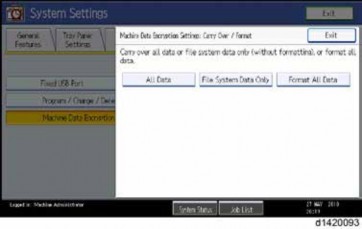
- The following message will be displayed. Press the [Start] key to print the encryption key for safe keeping.

- Press [Exit] to remove the following message.
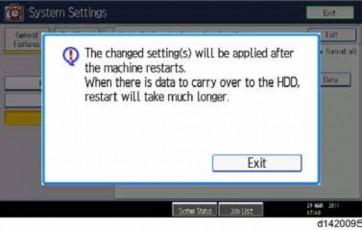
- Press [Exit] again.
- Press the [User Tools/Counter] key.

- After step 10, the initial operation display appears as below. However, HDD data encryption has not been completed at this moment. Step 11 and step 12 should be performed in order to encrypt the HDD data.
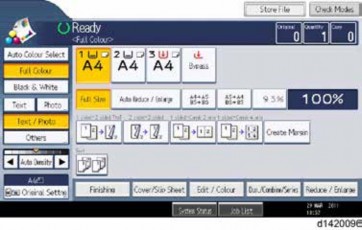
- After step 10, the initial operation display appears as below. However, HDD data encryption has not been completed at this moment. Step 11 and step 12 should be performed in order to encrypt the HDD data.
- Turn the main power switch off and on.
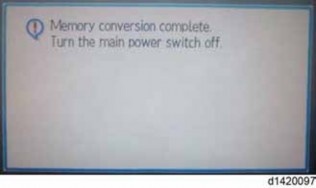
- "Memory Conversion complete. Turn the main power switch off" is displayed as below. Then turn the main power switch off and on.
- Then initial operation display appears again. After this step, HDD data encryption has already been completed.
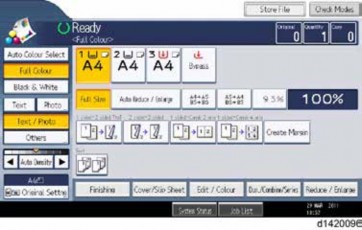
Installation
Check the Encryption Settings
- Press the [User tools/Counter] key
- Press [System Settings].
- Press [Administrator Tools].
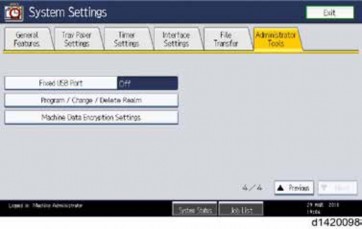
- Press [Machine Data Encryption Settings].
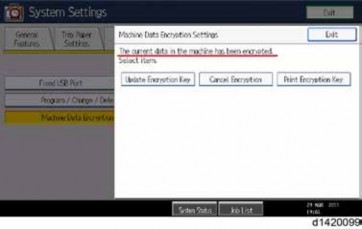
- Please confirm whether the encryption has been completed or not on this display.
Print the encryption key
Use the following procedure to print the key again if it has been lost or misplaced.- Press the [User tools/Counter] key.
- Press [System Settings].
- Press [Administrator Tools].
- Press [Machine Data Encryption Settings].
1. Press [Print Encryption Key].
Encryption key sample
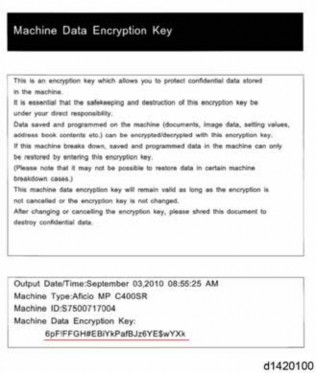
The encryption key is printed out as a sheet of paper like the example shown above. Please instruct the customer to keep it in a safe place.
MOVING THE MACHINE
This section shows you how to manually move the machine from one floor to another floor. See the section "Transporting the Machine" if you have to pack the machine and move it a longer distance.
Installation
- Before turning off the main power, make sure 100% is shown as available memory on the screen if the fax option is installed.
- Turn off the main power.
- Disconnect the power plug from the outlet.
- Close all covers and paper trays, including the front cover and bypass tray.
- Keep the machine level and carry it carefully, taking care not to jolt or tip it, and protect the machine from strong shocks.
- When moving the machine, do not press against the ADF.
TRANSPORTING THE MACHINE
Main Frame
- Remove the toner cartridges. This prevents toner flow into the toner supply tube, which is caused by vibration during transport. This can also cause the tube to be clogged with toner.
- Make sure there is no paper left in the paper trays. Then fix down the bottom plates with a sheet of paper and tape.
- Take out the scanner stay from inside the front door and install the scanner stay.
- Do one of the following:
- Attach shipping tape to the covers and doors.
- Shrink-wrap the machine tightly.

- After you move the machine, make sure you do the "Auto Color Registration" as follows. This optimizes color registration.
- 1. Do the "Forced Line Position Adj. Mode d" (SP2-111-4).
- 2. The result can be checked with SP2-194-007 (MUSIC Execution Result Execution Result) (0:Succeed, 1:Fail).
- Also, results for each color can be checked with SP2-194-010 to 013.
- Make sure that the side fences in the trays are correctly positioned to prevent color registration errors.
PAPER FEED UNIT PB3160
ACCESSORY CHECK
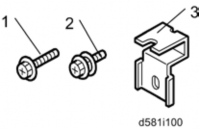
No. Description Q’ty 1 Screws (M4 × 10) 2 2 Screw with Spring Washer (M4 × 10) 2 3 Securing Bracket 2
INSTALLATION PROCEDURE

- Removal of stabilizers must always be with the consent of the customer. Do not remove them at your own judgment.
- The machine should be held at the correct locations and lifted gently.
- If it is lifted without care, handled carelessly or dropped, it may result in an injury.
- When installing this option, turn the machine power OFF, and unplug the power supply cord from the wall socket.
- If it is installed with the power on, it may result in an electric shock or a malfunction.
- Be sure to join the machine to the paper feed unit so as to prevent equipment from falling over.
- If they are not connected, they may move and fall over, resulting in injury.
- Remove the orange tape and retainers.
- Remove the items provided (fixing screws, etc.) from the package.
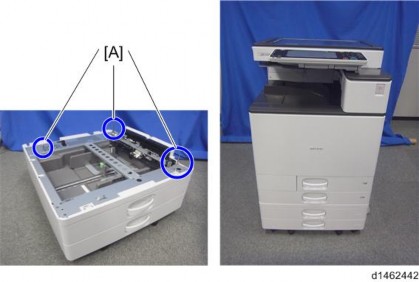
Holding the grips on the machine, align it with the locating pin [A], and place the machine on the paper feed unit.

Installation
- When you lift the machine, hold the correct locations.
- In particular, do not lift the machine by holding the scanner unit, etc, because this may cause the machine to deform.
- Do not put the machine down on the paper feed unit as a temporary resting place. This may cause the paper feed unit to deform. Always connect the machine and paper feed unit properly.
- Pull out the 2nd paper feed tray.
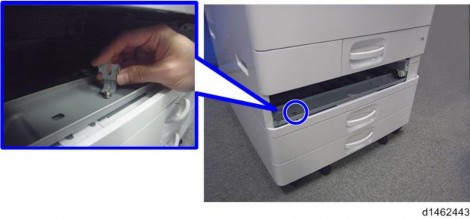
- Using securing bracket as a screwdriver, fix the machine to the feed unit (spring washer: screw: M4×10: 1).
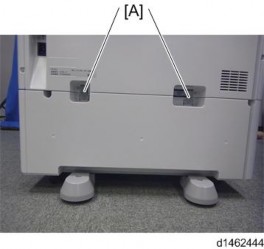
- Attach the securing brackets [A] to two positions on the left and right at the rear of the machine (screws: 1 each).
- Return the paper feed tray to the machine
- Attach the decals as shown below.
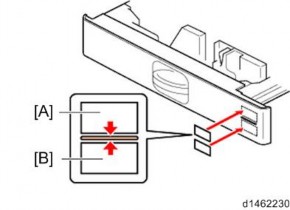
[A]: Tray number decal : Paper size decal

- The tray number decal and paper size decal are packaged together with the machine.
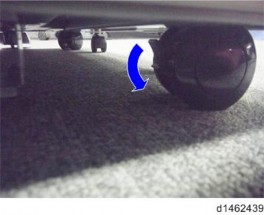
[*]Connect the power cord to the machine.

Installation
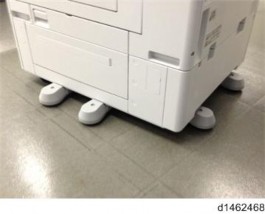
- Stabilizers are attached to the machine when it is shipped. Do not remove it.
[*]Set the paper, and check that the paper size set in the paper feed tray is displayed on the operation panel.
[*]Adjust the registration for the paper feed unit.
SP1-002-004 (Side-to-Side Registration Paper Tray 3) SP1-002-005 (Side-to-Side Registration Paper Tray 4)
[*]PAPER FEED UNIT PB3150
ACCESSORY CHECK
Description Q’ty Securing Bracket 2 Screw with Spring Washer - M4 × 10 1 Screws - M4 × 10 2 Rating label 1 Decal - EMC Address 1
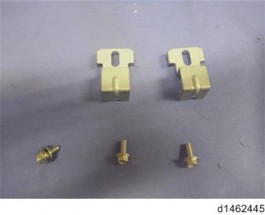
INSTALLATION PROCEDURE

- The machine should be held at the correct locations and lifted gently by two people.
- If it is lifted without care, handled carelessly or dropped, it may result in injury.
- When installing this option, turn the machine power OFF, and unplug the power supply cord from the wall socket.
- If it is installed with the power on, it may result in an electric shock or a malfunction.
- Be sure to join the machine to the paper feed unit so as to prevent equipment from falling over.
- If they are not connected, they may move and fall over, resulting in injury.
- Remove the orange tape and retainers.
- Remove the items provided (fixing screws, etc.) from the package.
- Holding the grips on the machine, align it with the locating pin [A], and place the machine on the paper feed unit.
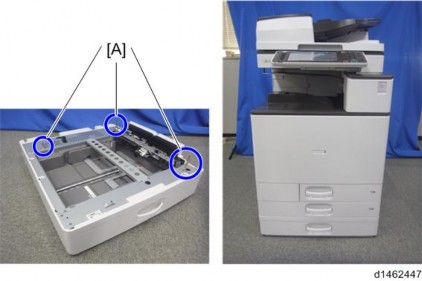

Installation
- When you lift the machine, hold the correct locations.
- In particular, do not lift the machine by holding the scanner unit, etc., because this may cause the machine to deform.
- Do not put the machine down on the paper feed unit as a temporary resting place. This may cause the paper feed unit to deform. Always connect the machine and paper feed unit properly.
- Pull out the 2nd paper feed tray.
- Using a securing bracket as a screwdriver, fix the machine to the feed unit (spring washer: screw: M4×10: 1).
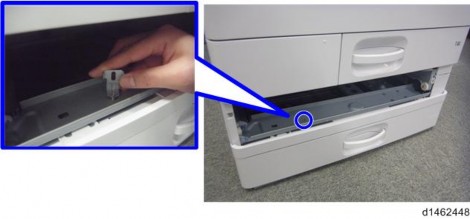
- Attach the securing brackets [A] to two positions on the left and right at the rear of the machine (screws: 1 each).
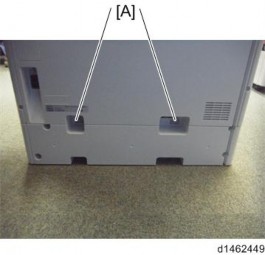
- Return the paper feed tray to the machine.
- Attach the decals as shown below.
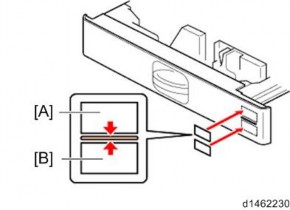
[A]: Tray number decal : Paper size decal

- The tray number decal and paper size decal are packaged together with the machine.
[*]Turn the power switch ON.
[*]Set the paper, and check that the paper size set in the paper feed tray is displayed on the operation panel.
[*]Adjust the registration for the paper feed unit.
SP1-002-004 (Side-to-Side Registration Paper Tray 3)
[*]LCIT PB3170
Installation
ACCESSORY CHECK
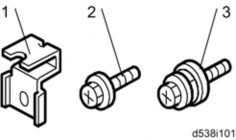
No. Description Q’ty 1 Securing Bracket 2 2 Screw(M4×10) 2 3 Hexagonal Bolt 1
INSTALLATION PROCEDURE

- Removal of stabilizers must always be with the consent of the customer. Do not remove them at your own judgment.
- The machine should be held at the correct locations and lifted gently.
- If it is lifted without care, handled carelessly or dropped, it may result in an injury.
- When installing this option, turn the machine power OFF, and unplug the power supply cord from the wall socket.
- If it is installed with the power on, it may result in an electric shock or a malfunction.
- Be sure to join the machine to the paper feed unit so as to prevent equipment from falling over.
- If they are not connected, they may move and fall over, resulting in injury.
[*]Remove the orange tape and retainers.
[*]Remove the items provided (fixing screws, etc.) from the package.
[*]Holding the grips on the machine, align it with the locating pin [A], and place the machine on the paper feed unit.
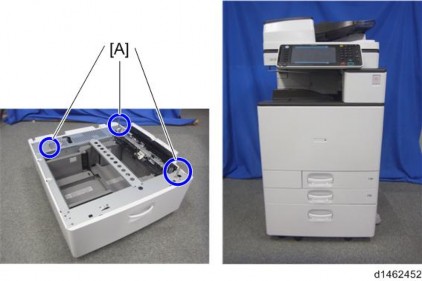

- When you lift the machine, hold the correct locations.
- In particular, do not lift the machine by holding the scanner unit, etc., because this may cause the machine to deform.
- Do not put the machine down on the paper feed unit as a temporary resting place. This may cause the paper feed unit to deform. Always connect the machine and paper feed unit properly.
[*]Using a securing bracket as a screwdriver, fix the machine to the feed unit (spring washer: screw: M4×10: 1).
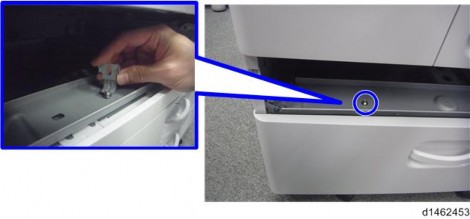
[*]Attach the securing brackets [A] to two positions on the left and right at the rear of the machine (screws: 1 each).
