HOME PAGE | < Previous | Contents | Next >
Anti-Condensation Heater (Scanner, PCDU)
Installation
Installation
Installation
Installation Procedure
1. Remove the rear cover [A].
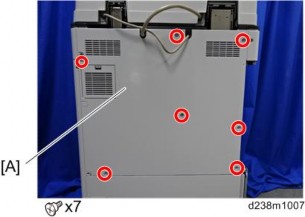
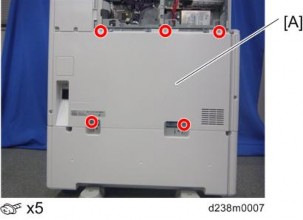
2. Remove the rear lower cover [A].
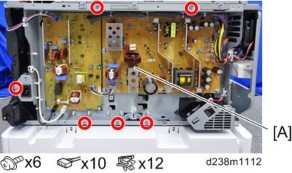
3. Remove the power supply box [A] ![]() x6, Among them, tapping screw x1)
x6, Among them, tapping screw x1)
Anti-Condensation Heater (Scanner, PCDU)
4. Release the 5 clamps.
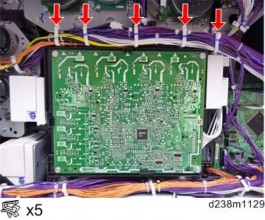
5. Remove the HVP-CB with bracket [A] (Hook x2).
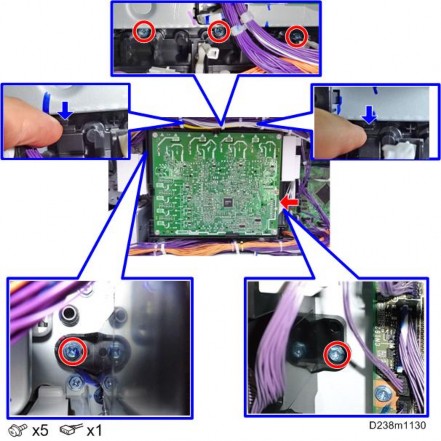
Installation
Installation
Installation
Anti-Condensation Heater (Scanner, PCDU)
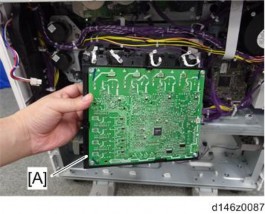
6. Connect the combined Blue/White harness to the back frame [A].
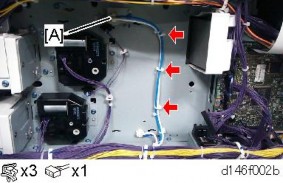
The harness will be connected to the relay board. See the details in step 8.
7. Reinstall the HVP-CB unit and power supply box.
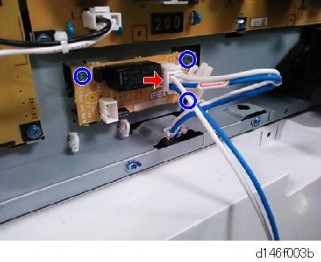
8. Secure the relay board to the main machine and connect the Blue/White harness to the socket on the board ![]() × 1,
× 1, ![]() × 3).
× 3).
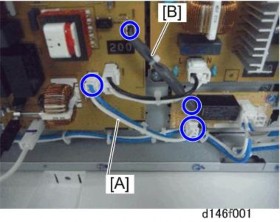
9. Connect the harnesses on the relay board to the sockets on the PSU.
Two types of harnesses are packed with the heater. Both the Blue/White one [A] and the Gray one [B] must be connected as shown below.
Anti-Condensation Heater (Scanner, PCDU)
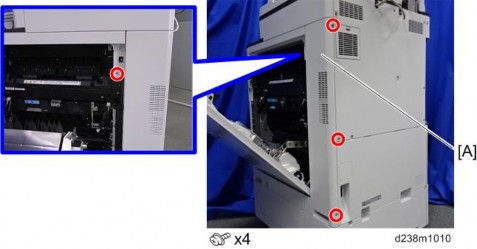
10. Remove the right rear cover [A] ![]() x4, among them, tapping screw x1)
x4, among them, tapping screw x1)
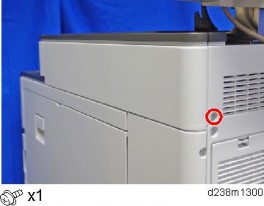
11. Remove a screw.
Anti-Condensation Heater (Scanner, PCDU)
Installation
Installation
Installation
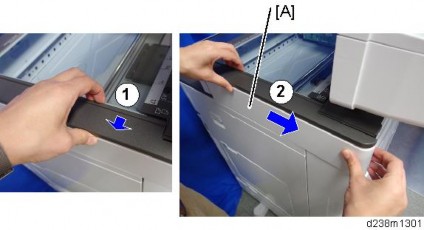
12. Remove the scanner right cover [A].
Remove the hook at the upper part, and then slide the cover in the rear direction.
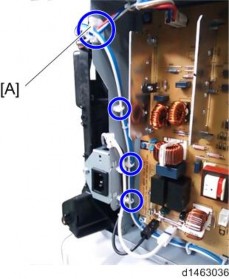
13. Route the harness around the outside of the PSU and pull the harness out of the electrical box through the hole [A] ![]() x 4).
x 4).
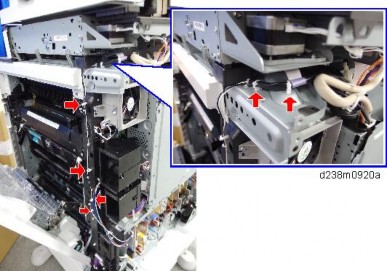
14. Route the harness in the direction of the scanner ![]() x 6).
x 6).
Anti-Condensation Heater (Scanner, PCDU)
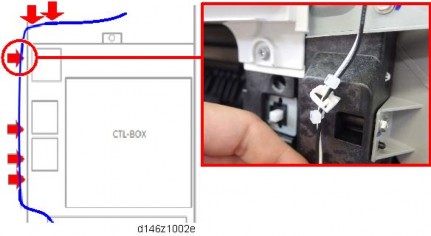
Fasten the clamp between the bindings of the harness at the location indicated by the red circle.
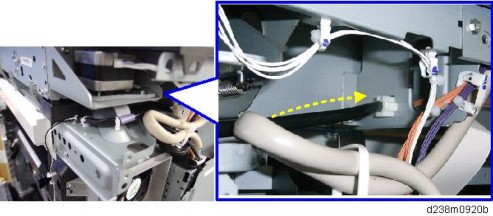
15. Attach the connector to the frame.
Connect it to the heater harness in step 25.
16. Remove the scale [A]
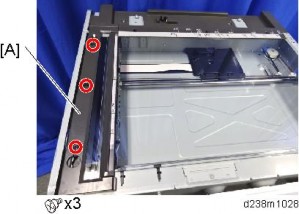
Anti-Condensation Heater (Scanner, PCDU)
Installation
Installation
Installation
17. Remove the sheet-through exposure glass [A]
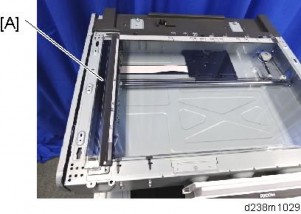
18. Remove the rear scale [A]
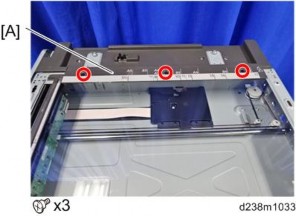
19. Remove the left scale and exposure glass [A]
The exposure glass and the left scale are attached with double-sided tape.
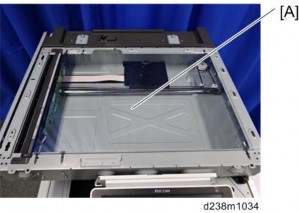
Anti-Condensation Heater (Scanner, PCDU)
20. Move the scanner carriage to the right.
21. Attach the heater [B] to the bracket [A] provided with the accessories ![]() × 2).
× 2).
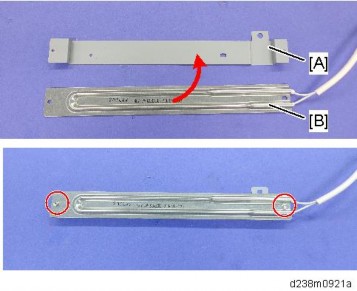
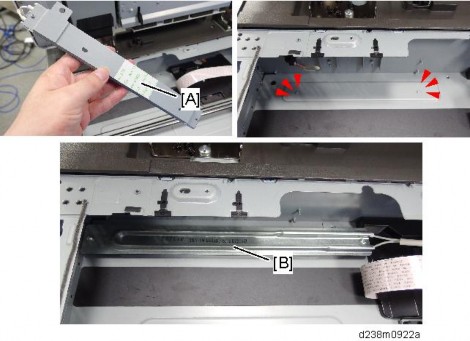
22. Remove the release paper [A] on the back side of the bracket, and secure the heater
[B] with the seal, aligning it with the boss on the frame.
Anti-Condensation Heater (Scanner, PCDU)
Installation
Installation
Installation
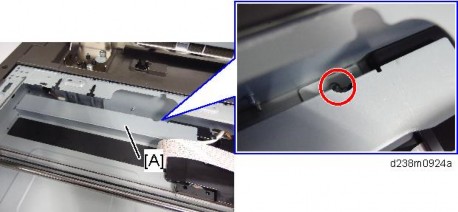
23. Pull the harness [A] out of the frame hole.
Route the harness into the harness guide.
24.
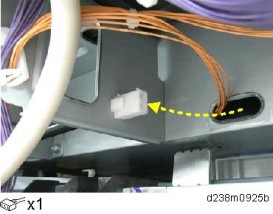
25. Connect the heater harness that was pulled out of the frame hole to the connector which was mounted in step 15.
26. Reattach all the removed covers.