HOME PAGE | < Previous | Contents | Next >
4.12.19 TRANSPORT COIL UNIT
Y
1. Image transfer belt unit (page 4-71)
2. PCDU (page 4-58)
3. Toner bottle drive motor (page 4-120)
4. Sub hopper (page 4-114)
5. ID chip contact board (page 4-122)
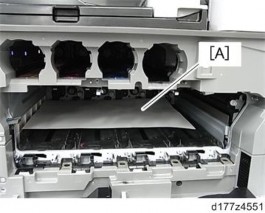
6. Put a piece of disposable paper [A] on the inside of the machine to avoid damage due to toner spillage.
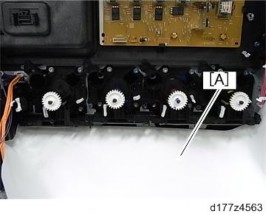
7. Put a piece of disposable paper [A] under the transport coil to avoid damage due to toner spillage.
8. Remove all the harnesses connecting to the transport coil unit ![]() ×8).
×8).
Replacement and Adjustment
Replacement and Adjustment
Replacement and Adjustment
Drive Unit
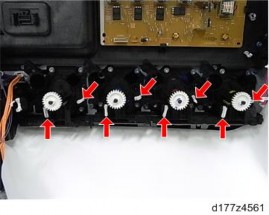
9. Remove the screws fixing the transport coil units [A] ![]() ×5, each color).
×5, each color).
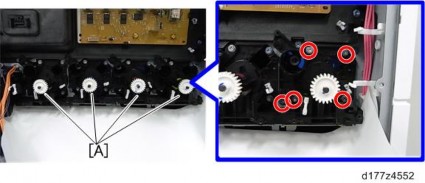
10. Release the claws for the transport coil units [A] (claw ×1, each color).
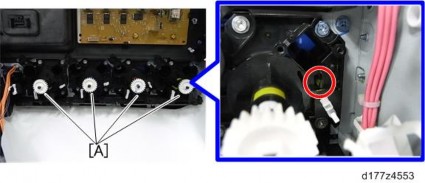
11. Remove the screws securing the bracket [A] ![]() ×2).
×2).
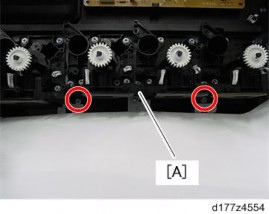
12. Put a piece of disposable paper on the floor because toner can spill when you put the transport coil unit down.
Drive Unit
13. Pull out the whole transport coil unit [A] together with the bracket [B].
Be sure to put a piece of disposable paper on the floor because toner can spill when you put the transport coil unit down.
14. Transport coil unit for (Y) [A] (tab×1).