HOME PAGE | < Previous | Contents | Next >
Replacement and Adjustment
Replacement and Adjustment
Replacement and Adjustment
5. Rear cover (page 4-14)
6. Controller box cover (page 4-182)
7. While pressing the lock release lever, pull out the FFC [A].
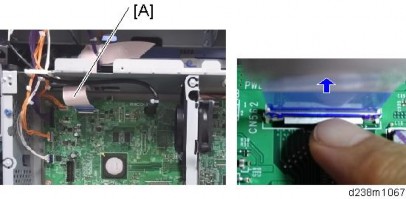
When Changing the FFC
When changing the FFC, stick the Mylar [A] to the new FFC.
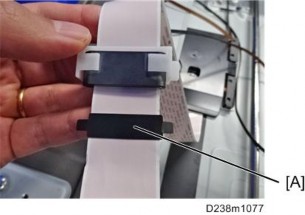
When attaching the Mylar, follow the steps below.
1. Feed the FFC through the ferrite core [A].
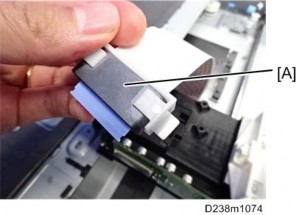
2. Connect the FFC to the scanner carriage’s connector, and then lift the lever [A] to lock it.
Scanner Unit
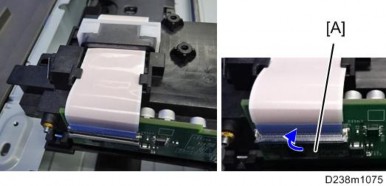
3. Attach the Mylar [A] to the FFC from above, and then insert the tabs at both ends of the Mylar into the gaps in the FFC holder to secure it in position.
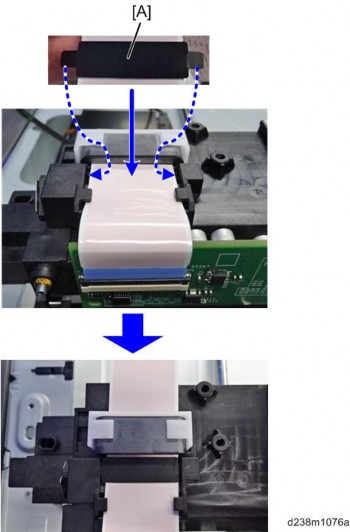
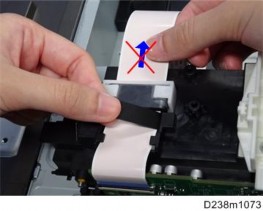
When applying the Mylar, be sure not to stretch the FFC.
Applying the Mylar while stretching the FFC causes the circuit board to be deformed.
Replacement and Adjustment
Replacement and Adjustment
Replacement and Adjustment
Scanner Unit
