HOME PAGE | < Previous | Contents | Next >
2.14.2 INSTALLATION PROCEDURE
![]()
Turn off the main switch of the copier and unplug the power cord before you start the installation procedure.
![]()
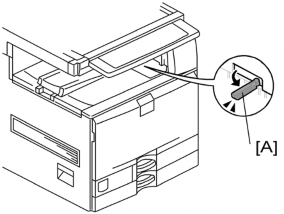
If you will install the 1-bin tray (D632) on the machine, install the 1-bin tray first before installing the side tray (D635). This makes it easier to do the following procedure.
1. Remove all tapes.
2. If the sensor feeler [A] is out, fold it into the machine.
3. Open the right door of the machine.
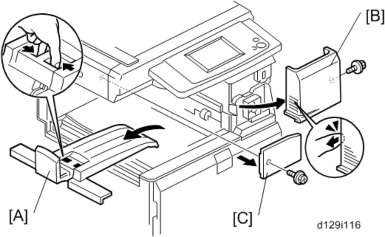
4. Remove the inner tray [A].
5. Remove the front right cover [B] ![]() x 1).
x 1).
6. Remove the connector cover [C] ![]() x 1).
x 1).
Side Tray (D635)
Installation
Installation
Installation
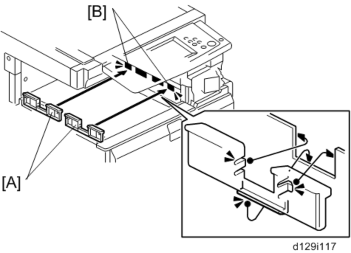
7. Attach the two guides [A] to the cutouts [B] in the inner tray.
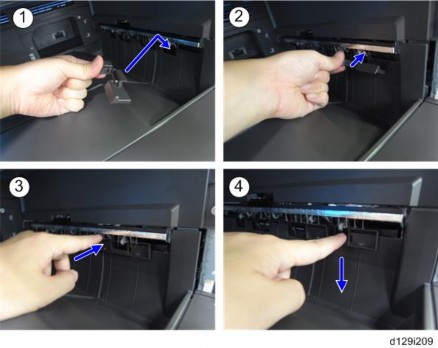
1) Place the lower hook of the guide in the cutout of the paper exit.
2) Attach the guide as shown until the two side hooks hold the paper exit.
3) Press the guide.
4) Press down the guide as shown.
Side Tray (D635)
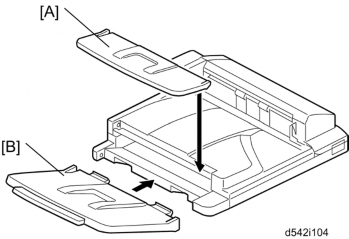
8. Attach the main output tray [A] and sub output tray [B] to the side tray unit.
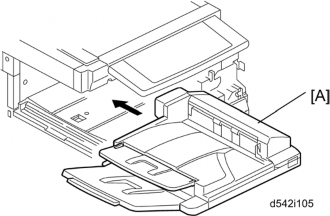
9. Install the side tray unit [A] in the machine.
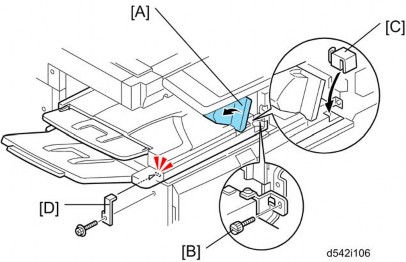
10. Open the side tray cover [A].
11. Secure the side tray unit with the knob screw [B].
12. Attach the frame cover [C].
13. Reinstall the front right cover on the machine, and then close the right door of the machine.
Side Tray (D635)
![]()
Open the side tray cover [A] when installing the front right cover. Otherwise, you cannot reinstall it.
14. Install the holder bracket [D] ![]() x 1).
x 1).
15. Turn on the main power switch of the machine.
Installation
Installation
Installation
16. Check the side tray operation.