HOME PAGE | < Previous | Contents | Next >
10. Attach the correct brand decal to the machine [A].
11. Attach the correct emblem and the cover to the front door [B] of the machine, if the emblem is not attached.
![]()
If you want to change the emblem that has been already attached, remove the panel with a small screwdriver, and then install the correct emblem.
12. Attach the correct paper tray number and size decals to the paper trays [C].
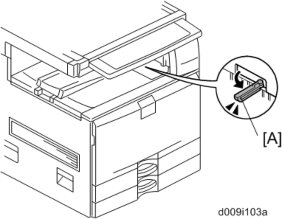
13. Pull out the feeler [A] for the output tray full detection mechanism.
PCDU (Photoconductor and Development Unit)
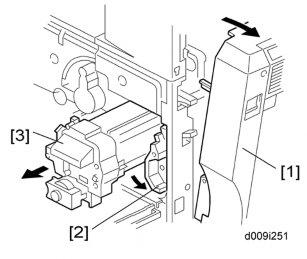
1. Open the front door.
2. Open the right door [1].
3. Release the lock lever [2].
4. Pull out the PCDU [3] and place it on a clean flat surface.
5. Spread a large piece of paper on a flat surface.
Main Machine Installation
![]()
Installation
Installation
Installation
Make sure the area is free of pins, paper clips, staples, etc. to avoid attraction to the magnetic development roller.
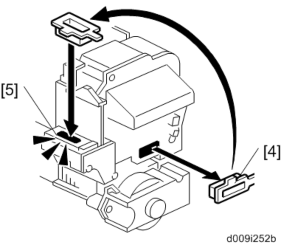
6. Remove the opening cap [4], and then install it in the opening [5] of the PCDU.
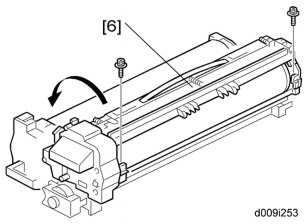
7. Open the PCDU [6] ![]() x 2).
x 2).
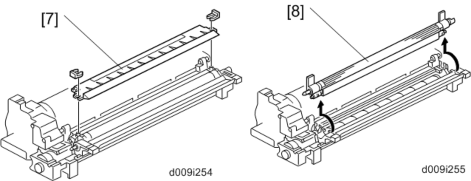
8. Remove the entrance seal plate [7] ![]() x 2).
x 2).
9. Remove the development roller unit [8], and set it on the paper.
Main Machine Installation
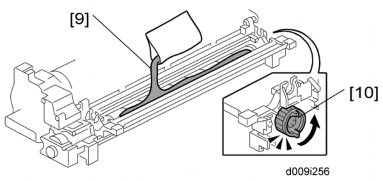
10. Pour the developer [9] into the development unit.
![]()
The developer lot number is embossed on the end of the developer package. Do not discard the package until you have recorded the lot number. ![]() p.4-46 "Developer")
p.4-46 "Developer")
1) Pour approximately 1/3 of the developer evenly along the length of the development unit.
2) Rotate the drive gear [10] to work the developer into the unit.
3) Repeat until all the developer is in the development unit.
4) Continue to turn the drive gear until the developer is even with the top of the unit.
11. Put the opening cap [4] back in its original place.
12. Reassemble the PCDU.
13. Re-install the PCDU.