HOME PAGE | < Previous | Contents | Next >
2.6 LCIT RT3030
Installation
Installation
Installation
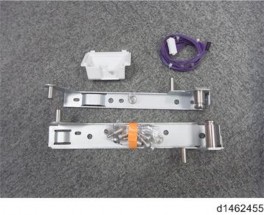
2.6.1 ACCESSORY CHECK
Description | Q’ty |
Screws – M3 × 6 | 1 |
Tapping screw – M3 × 6 | 1 |
Connecter Cover | 1 |
Rating label | 1 |
Joint Bracket | 1 |
Harness | 1 |
2.6.2 INSTALLATION PROCEDURE
![]()
When installing this option, turn the power of the machine off, and unplug the power plug from the wall socket.
If it is installed when the power is on, it will result in an electric shock or a malfunction.
![]()
Before installing this option, first attach the “Paper Feed Unit PB3160” or “LCIT PB3170”.
1. Remove the orange tape and retainers.
2. Remove the enclosed items (fixing screws, etc.).
3. Covers on the right of the paper feed table (8).
LCIT RT3030
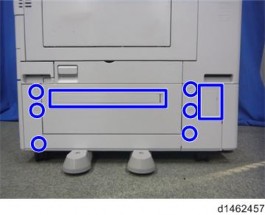
4. Attach the connecting pins [A] to the front and rear on the right of the paper feed table.
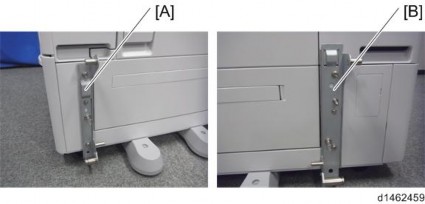
5. Attach the brackets [A], [B] at the positions of the connecting pins ( ×4).
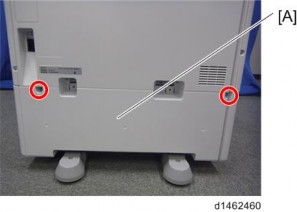
6. Paper feed table rear covers [A] ![]() ×2).
×2).
LCIT RT3030
Installation
Installation
Installation
7. Clamp the harness [A].
8. Clamp the harness
9. Attach the paper feed table rear cover.
10. Attach the hook of the side LCT to the bracket.
LCIT RT3030
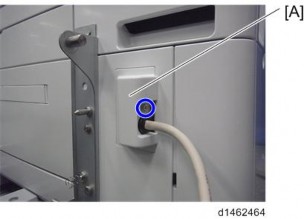
11. Connect the cable [A] of the side LCT to the machine ![]() ×1).
×1).
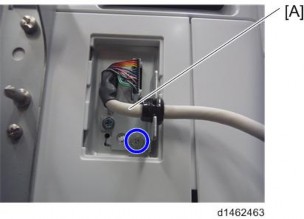
12. Attach the cable cover [A] ![]() ×1).
×1).
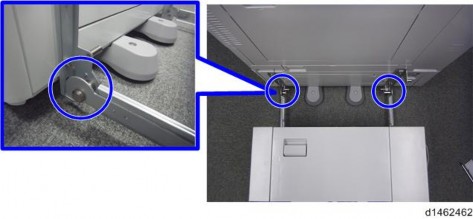
13. Push the side LCT towards the machine.