HOME PAGE | < Previous | Contents | Next >
2.10.2 INSTALLATION PROCEDURE
![]()
When you install this option, turn off the power supply to the machine, and unplug the power plug from the wall socket.
If it is installed when the power is ON, it will result in an electric shock or a malfunction.
![]()
Do not turn the power on until you perform “adjustment after installation,” otherwise it may not start normally.
Attaching the SPDF
1. Place the unit on the machine temporarily, and remove the orange tape and shipping retainers.
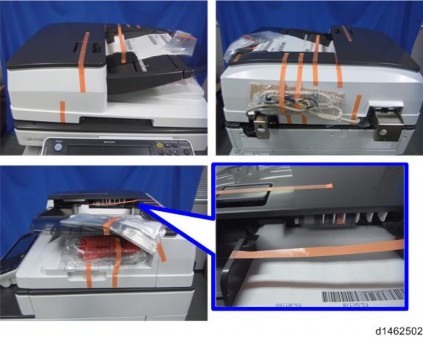
2. Remove the items in the package (boards, fixing screws, etc.).
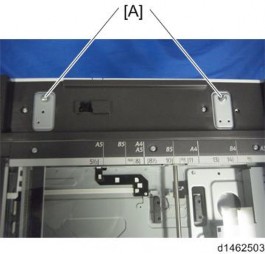
3. Attach the 2 stepped screws [A] to the machine.
SPDF DF3080
Installation
Installation
Installation
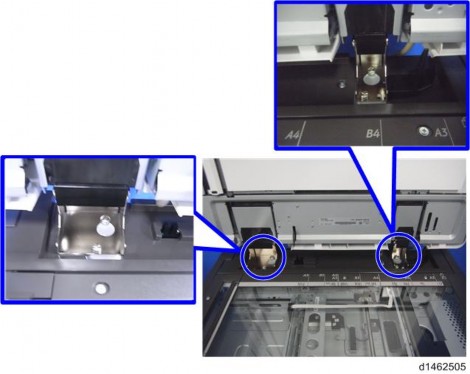
4. Align the hinges of the SPDF with the stepped screws, and attach them by sliding them in.
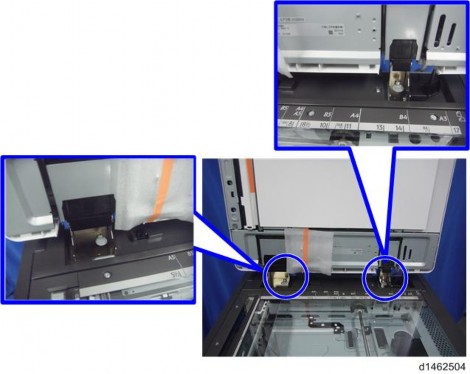
5. Fix the SPDF to the machine (coin screws×2)
SPDF DF3080
6. Release the lever [A], open the pressure plate sheet [B], gently remove the protective sheet [C], and shut the pressure plate sheet.
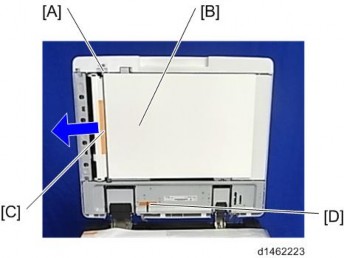
7. Remove the filament tape [D].
8. Remove the platen sheet [A], and set it on the exposure glass. Align it with the left scale and rear scale of the printer.