HOME PAGE | < Previous | Contents | Next >
Replacement and Adjustment
Replacement and Adjustment
Replacement and Adjustment
Adjustment after Replacing the Laser Unit
1. Close the front cover and attach the left cover.
Attach the left cover before turning on the main power switch. Laser beams can seriously damage your eyes.
2. Plug in and turn on the main power switch.
3. Download the data of the new laser unit to the main body with SP2-110-005. 4. Check that SP2-119-001 to 003 is "0."
If it is not "0", perform SP2-110-005 again.
If it is not executed correctly, outputs will be abnormal (magnification and color registration errors), and SC 285 may occur.
5. Turn off the main power switch and disconnect the power cord.
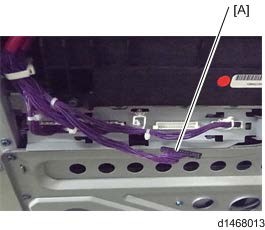
6. Remove the left cover and attach the laser optics positioning motor harness [A].

7. Close the left cover.
8. Plug in and turn on the main power switch.
9. Select [14: Trimmed area] in SP2-109-003, and then press [OK].
10. Press [Copy Window], and then print the test pattern in the copy screen.
Check if the margin on either side on the output (14: Trimmed area) is less than 4±1 mm or not. If it is not within these limits, change the reference value (Bk) of the main scanning magnification adjustment (SP2-102-001 to -003).
Adjust the values of the main scanning magnification only for Bk (black). It is not necessary to adjust other color’s values (cyan, magenta, yellow) because other colors are automatically adjusted in relation to the setting for Bk.
Input the same value for each SP (SP2-102-001 to -003) even though there are three SPs of the main scanning magnification adjustment for the standard, middle and low line speed which are used for each paper type.
Laser Unit
Check if the margin on the left side on the output (14: Trimmed area) is less than 2±1 mm or not. If it is not within these limits, change the reference value (Bk) of the registration adjustment (SP2-101-001).
11. Set SP2-109-003 to "0: None" after adjusting the main scanning magnification and registration.
12. Perform line adjustment.
SP2-111-004: Forced Line Position Adj. Mode d
The result can be checked with SP2-194-007 (MUSIC Execution Result Execution Result) (0: Success, 1: Failure).
Also, results for each color can be checked with SP2-194-010 to 013 (1: Completed successfully).
13. Exit the SP mode.