HOME PAGE | < Previous | Contents | Next >
Anti-Condensation Heater (Scanner, PCDU)
Installation
Installation
Installation
Installation Procedure
1. Remove the rear cover [A].
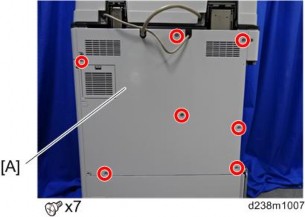
2. Remove the rear lower cover [A].
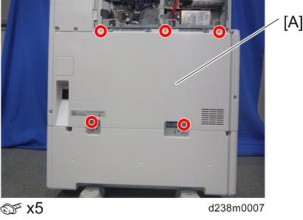
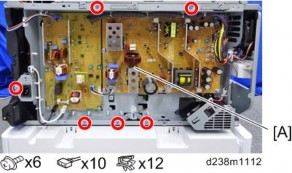
3. Remove the power supply box [A] ![]() x6, Among them, tapping screw x1)
x6, Among them, tapping screw x1)
Anti-Condensation Heater (Scanner, PCDU)
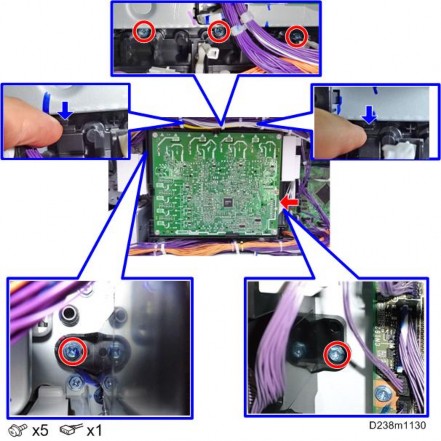
4. Release the 5 clamps.
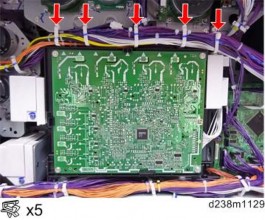
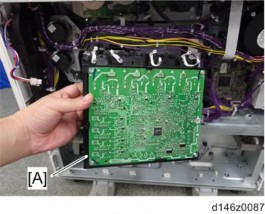
5. Remove the HVP-CB with bracket [A] (Hook x2).
Installation
Installation
Installation
Anti-Condensation Heater (Scanner, PCDU)
6. Connect the combined Blue/White harness to the back frame [A].
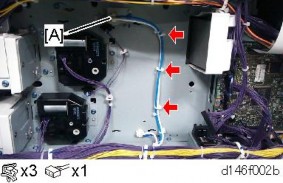
The harness will be connected to the relay board. See the details in step 8.
7. Reinstall the HVP-CB unit and power supply box.
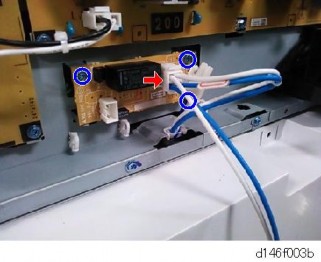
8. Secure the relay board to the main machine and connect the Blue/White harness to the socket on the board ![]() × 1,
× 1, ![]() × 3).
× 3).
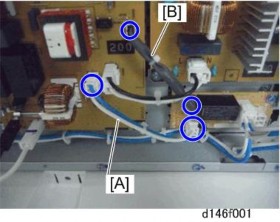
9. Connect the harnesses on the relay board to the sockets on the PSU.
Two types of harnesses are packed with the heater. Both the Blue/White one [A] and the Gray one [B] must be connected as shown below.
Anti-Condensation Heater (Scanner, PCDU)
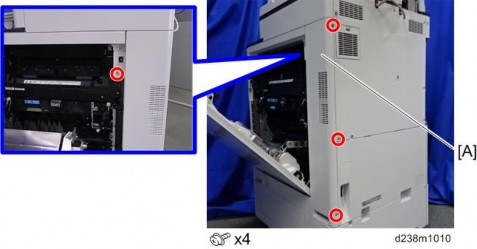
10. Remove the right rear cover [A] ![]() x4, among them, tapping screw x1)
x4, among them, tapping screw x1)
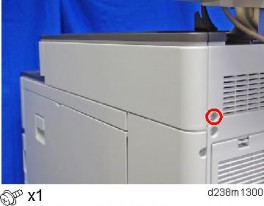
11. Remove a screw.
Anti-Condensation Heater (Scanner, PCDU)
Installation
Installation
Installation
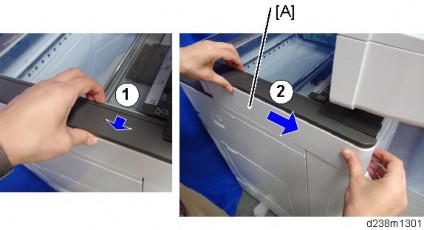
12. Remove the scanner right cover [A].
Remove the hook at the upper part, and then slide the cover in the rear direction.
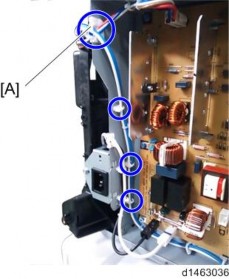
13. Route the harness around the outside of the PSU and pull the harness out of the electrical box through the hole [A] ![]() x 4).
x 4).
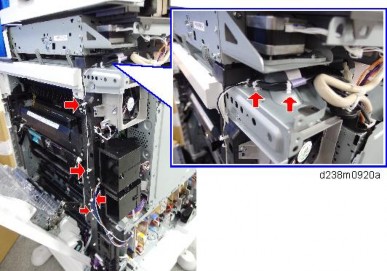
14. Route the harness in the direction of the scanner ![]() x 6).
x 6).
Anti-Condensation Heater (Scanner, PCDU)
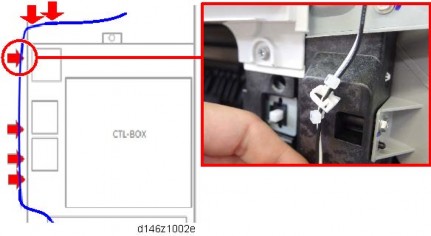
Fasten the clamp between the bindings of the harness at the location indicated by the red circle.
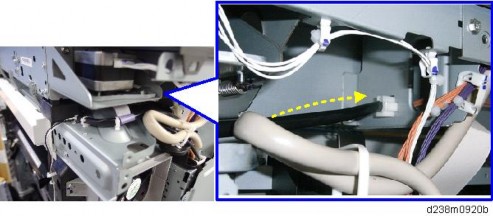
15. Attach the connector to the frame.
16. Remove Feed Trays 1 and 2.
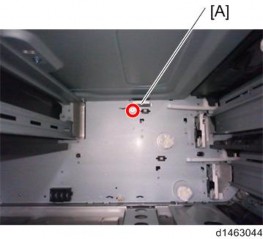
17. The connecter cover located inside the machine [A] ![]() × 1).
× 1).
Anti-Condensation Heater (Scanner, PCDU)
Installation
Installation
Installation
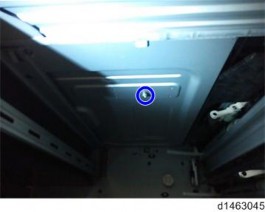
18. Temporarily tighten a screw at the top ![]() M3x8: x1).
M3x8: x1).
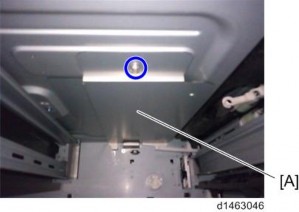
19. Install the heater [A] by connecting the connector to the inside of the machine, then tighten the screw completely.
Hold the heater against the inside during final tightening.
20. Reinstall the connector cover ![]() × 1).
× 1).
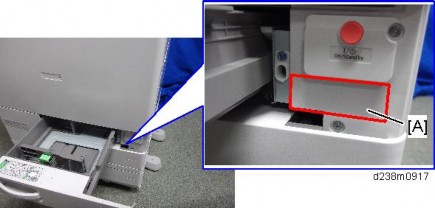
21. Attach the warning decal [A].
22. Reassemble the machine.
23. Connect the power cord, and then check that the heater is being powered and heated.