HOME PAGE | < Previous | Contents | Next >
Replacement and Adjustment
Replacement and Adjustment
Replacement and Adjustment
Adjustment Procedure
1. Enter SP2-109-003.
2. Print out the test pattern (14: Trimmed area) with SP2-109-003.
Registration can change slightly as shown on the previous page. Print some pages of the "14: Trimmed area" for step 3 and 4. Then average the leading edge and
side-to-side registration values, and adjust each SP mode.
3. Do the leading edge registration adjustment.
1) Check the leading edge registration and adjust it with SP1-001.
2) Select the adjustment conditions (paper type and process line speed).
3) Input the value. Then press the ![]() key.
key.
4) Generate a trim pattern to check the leading edge adjustment.
4. Do the side-to-side registration adjustment.
1) Check the side-to-side registration and adjust it with SP1-002.
2) Select the adjustment conditions (paper feed station).
3) Input the value. Then press the ![]() key.
key.
4) Generate a trim pattern to check the leading edge adjustment.
4.20.5 ERASE MARGIN ADJUSTMENT
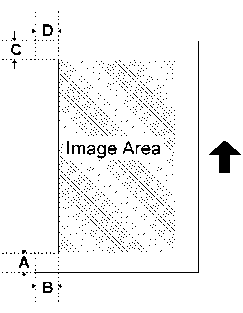
Adjust the erase margin C and D only if the registration (main scan and sub scan) cannot be adjusted within the standard values. Do the registration adjustment after adjusting the erase margin C and D, and then adjust the erase margin A and B.

1. Enter SP2-109-003.
2. Print out the test pattern (14: Trimmed area) with SP2-109-003.