HOME PAGE | < Previous | Contents | Next >
4.13.6 FUSING SLEEVE BELT UNIT
The fusing sleeve belt unit is designed with a highly soft material. Do not touch the sleeve belt unit with your hands to prevent dents during replacement. If you have touched it and a dent has been made, the dent will gradually become larger during operation and it can cause a fusing malfunction or sleeve belt breakage.
To cancel SC544-02/SC554-02, it is necessary to replace the fusing unit or install an intact new unit detection fuse. Refer to page 6-224 "When SC544-02, SC554-02 (Non-contact Thermistor High Temperature Detection) Is Displayed".
If you are replacing the fusing sleeve belt unit for PM or any reason other than canceling SC544-02/SC554-02, you can discard the fuse that is packed with the new fusing sleeve belt unit.
Adjustment before Replacing the Fusing Sleeve Belt Unit
Before replacing the fusing sleeve belt unit, set SP3-701-116 to "1" and switch the power OFF. Then replace the fusing sleeve belt unit and switch the power ON.
SP3-701 (Manual New Unit Set)
This SP is the new unit detection flag.
0: new unit detection flag OFF, 1: new unit detection flag ON
Item | SP |
Fusing sleeve belt unit | SP3-701-116 |
Replacement
1. Fusing upper cover (page 4-132)
2. Fusing lower cover (page 4-133)
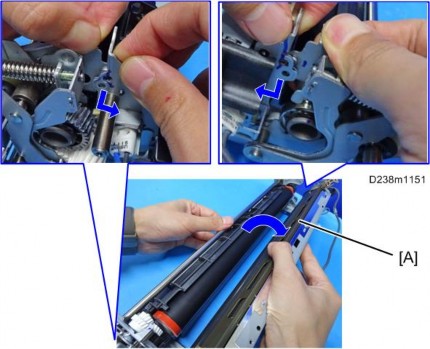
3. Left frame [A]
Fusing Unit
Replacement and Adjustment
Replacement and Adjustment
Replacement and Adjustment
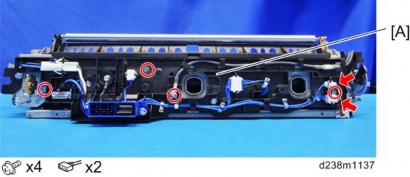
4. Exit guide plate (left) unit [A]
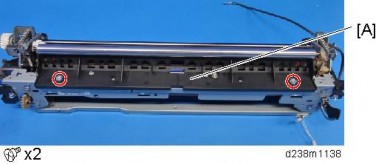
5. Fusing exit driven roller [A]
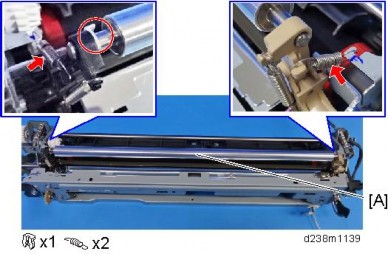
6. Side plate [A]
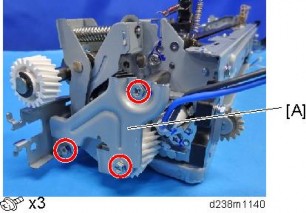
Fusing Unit
7. Two screws.
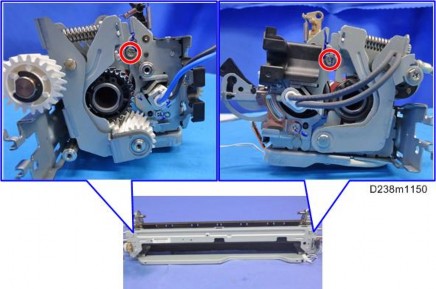
8. Release the boss caps on both sides, and then detach the fusing sleeve belt unit [A].
