HOME PAGE | < Previous | Contents | Next >
Replacement and Adjustment
Replacement and Adjustment
Replacement and Adjustment
Adjustment after Replacing the PCU and/or the Development Unit
1. Turn ON the main power.
2. Do the "Automatic Color Calibration (ACC)" for the copier mode & printer mode as follows:
1. "User Tools" icon > "Machine Features" > "Maintenance" > "Auto Color Calibration" > "Start"
2. Print the ACC test pattern.
3. Put the printout on the exposure glass.
4. Put 10 sheets of white paper on the test chart. This ensures the precise ACC adjustment.
5. Close the SPDF/ARDF or the platen cover.
6. Press "Start Scanning" on the LCD. Then, the machine starts the ACC.
3. Exit the User Tools mode.
4.9.3 IMAGING TEMPERATURE SENSOR (THERMISTOR)
1. Toner supply cooling fan unit (page 4-212)
2. Controller box (page 4-197)
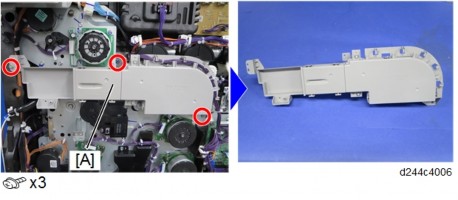
3. Duct [A]

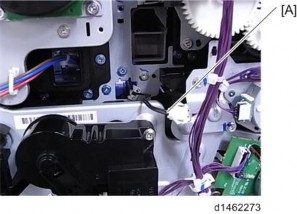
4. Connector [A]

PCDU
5. Image Transfer Belt Unit (page 4-71)
6. PCDU (K) (page 4-58)
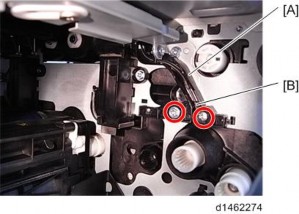
7. Imaging temperature sensor harness guide [A] and Imaging temperature sensor [B] ![]() ×2).
×2).
