HOME PAGE | < Previous | Contents | Next >
Booklet Stapler Unit (SR3220)
1.4 BOOKLET STAPLER UNIT (SR3220)
1.4.1 STAPLER UNIT
FINISHER SR3210/ BOOKLET FINISHER SR3220 (D3B8/D3B9)
FINISHER SR3210/ BOOKLET FINISHER SR3220 (D3B8/D3B9)
FINISHER SR3210/ BOOKLET FINISHER SR3220 (D3B8/D3B9)
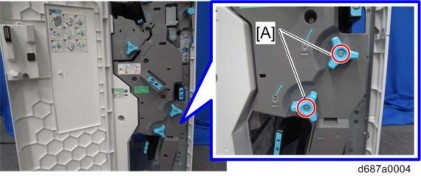
1. Open the front cover, and then remove two knobs [A] ![]() x1 for each)
x1 for each)
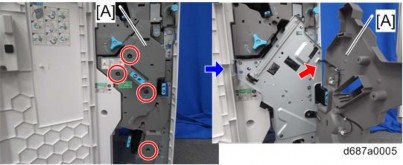
2. Booklet stapler unit cover [A] ![]() x4,
x4, ![]() x1)
x1)
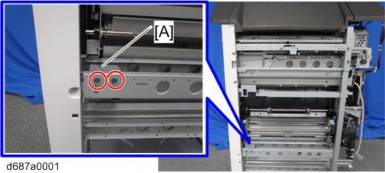
3. Stopper [A] ![]() ×2)
×2)
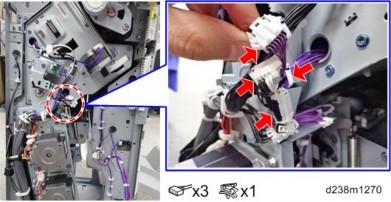
4. Disconnect three connectors and one clamp at the rear side of the booklet stapler unit.
Booklet Stapler Unit (SR3220)
5. Pull out the booklet stapler unit, and then release three clamps.
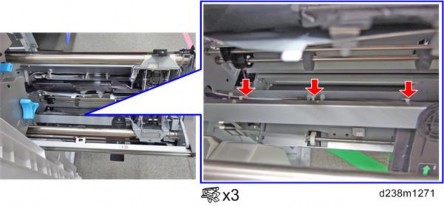
6. Bring the stapler unit [A] near the center.
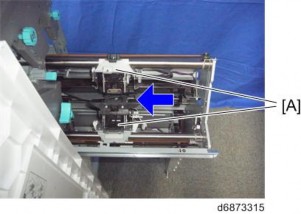
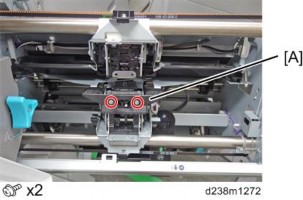
7. Small guide plate [A]
Booklet Stapler Unit (SR3220)
FINISHER SR3210/ BOOKLET FINISHER SR3220 (D3B8/D3B9)
FINISHER SR3210/ BOOKLET FINISHER SR3220 (D3B8/D3B9)
FINISHER SR3210/ BOOKLET FINISHER SR3220 (D3B8/D3B9)
8. Guide plate [A]
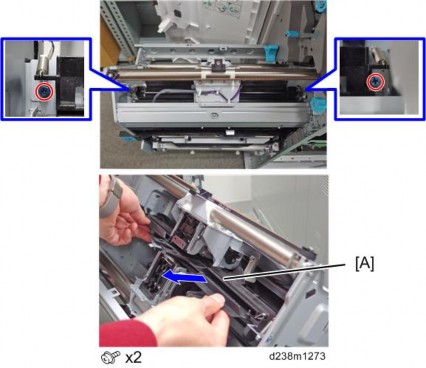
9. Stapler cartridge [A]
10.
Booklet Stapler Unit (SR3220)
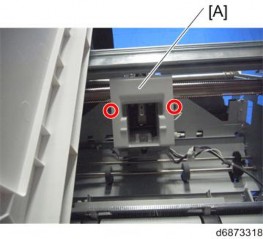
11. Stapler unit (clincher side) [A] ![]() ×3,
×3, ![]() ×2)
×2)
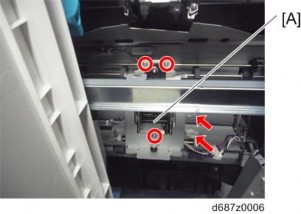
12. Disconnect three connectors and release four clamps on the stapler unit (driver side).
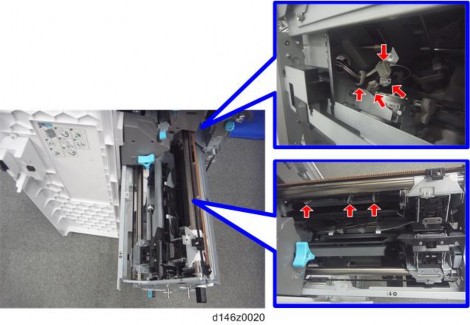
13. Stapler unit (driver side) [A] ![]() ×3,
×3, ![]() ×4)
×4)
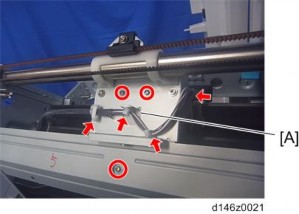
14. Attach the special tool* to the stapler unit to adjust the staple position of the stapler unit.
Check that four pins ([A] and [B]) on the special tool are fixed in the slots [C] on the stapler unit as shown below.
Booklet Stapler Unit (SR3220)
FINISHER SR3210/ BOOKLET FINISHER SR3220 (D3B8/D3B9)
FINISHER SR3210/ BOOKLET FINISHER SR3220 (D3B8/D3B9)
FINISHER SR3210/ BOOKLET FINISHER SR3220 (D3B8/D3B9)
[A]: Two pins for driver [B]: Two pins for clincher
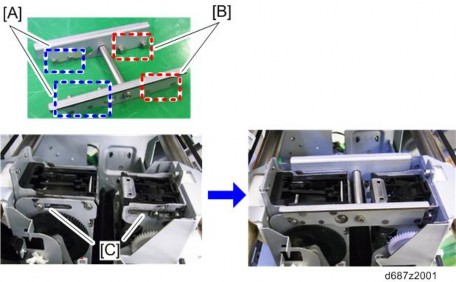
*Use the following part numbers to get the special tool
HOLDER FLONT(B7936410)
HOLDER: REAR (B7936420)
ROD: CLAMP (B7936431)
ADJUSTING SCREW: M4 (B7936432)
-or-
B7936400 STAPLER:SERVICE PARTS ASSY
15. Tighten the wing screw [A] on the special tool to secure the stapler and special tool.
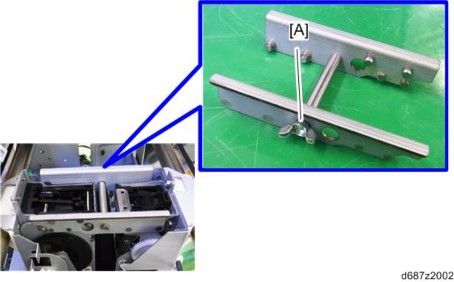
16. Tighten the screws completely to secure the clincher side [A] of the stapler ![]() ×3).
×3).
Booklet Stapler Unit (SR3220)
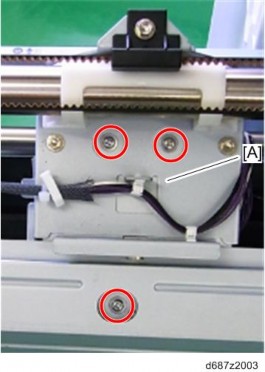
17. Loosen the wing screw to remove the special tool.
18. Reattach all the removed parts.
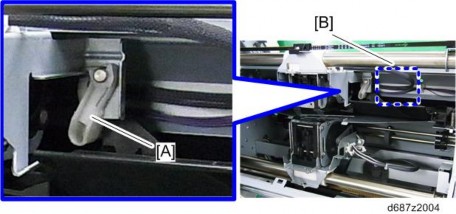
Make sure that the harnesses [B] are routed behind the resin part [A]. Otherwise, the harnesses block the route of the stapler, which causes a stapler transfer motor error.
19. Check that the stapler works properly.
All staple patterns must be checked.
If there are any problems with the clincher, adjust the staple position with the special tool again.