HOME PAGE | < Previous | Contents | Next >
1.3.8 IPDS UNIT (D641)
Accessories
Check the accessories and their quantities against the table below.
No. | Description | Q'ty |
1 | IPDS Emulation SD Card | 1 |
2 | Decal | 1 |
![]()
Printer Scanner Unit Type 5002 (D641)
Printer Scanner Unit Type 5002 (D641)
Printer Scanner Unit Type 5002 (D641)
Only two slots are available for SD cards that contain applications. If you want to use more than two applications, merge all applications into two SD cards (SP5873-001).
Installing Controller Options
Installation
1. Check the software version.
2. If necessary, update the firmware to the required version.
3. Turn off the main switch.
4.

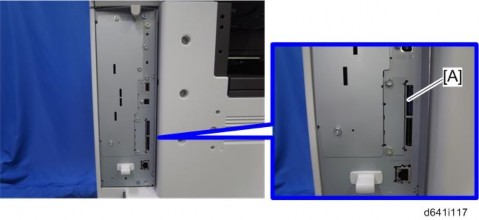
5. Insert the IPDS SD Card into Slot 1 (Upper Slot) [A].
![]()
Pushing in the SD Card releases it for removal. Make sure the SD Card is inserted and locked in place. If it is partially out of the slot, push it in gently until it locks in place.
6. Reattach the controller cover and turn ON the main switch.
Installing Controller Options
7. Do one of the following ("A" or "B") to enable the IPDS function.
A. [Enable the IPDS function via telnet]
1. Connect the machine via telnet.
2. Execute the following commands: msh> set ipds up
***If you want to stop the function. msh> set ipds down
B. [Enable the IPDS option via WebImageMonitor]
1. Log in to WebImageMonitor.
2. Change the setting to enable IPDS.

Printer Scanner Unit Type 5002 (D641)
Printer Scanner Unit Type 5002 (D641)
Printer Scanner Unit Type 5002 (D641)
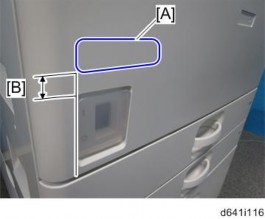
8. Attach the decal [A] as shown in the photo above.
Line up the left side of the decal with the left edged of the main power switch. ([B]: 10 mm or more)