HOME PAGE | < Previous | Contents | Next >
2.13.2 INSTALLATION PROCEDURE
![]()
Unplug the main machine power cord before starting the following procedure.
If this finisher is installed, the Bridge Unit (D634) and Paper Feed Unit (D580) or LCT (D581) must be installed before installing this finisher.


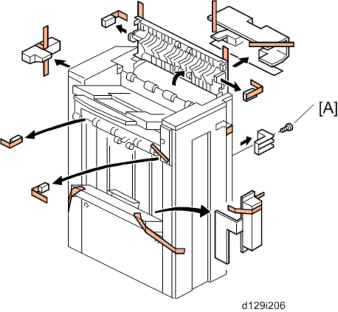
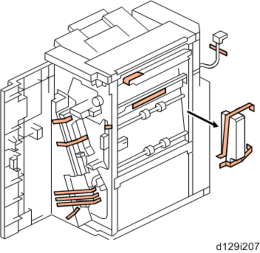
1. Unpack the finisher and remove the tapes.
![]()
Be sure to keep screw [A]. It will be needed to secure the grounding plate in step 3.
1000-sheet Finisher (D588)

Installation
Installation
Installation
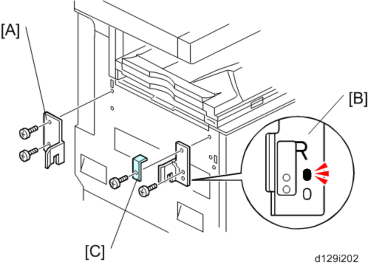
2. Install the rear joint bracket [A] ![]() x 2; M4 x 13) and front joint bracket [B]
x 2; M4 x 13) and front joint bracket [B] ![]() x 2; M4 x 13).
x 2; M4 x 13).
![]()
Holder bracket [C] must be placed outside the front joint bracket [B]. This bracket is provided with the Bridge Unit (D634).
3.
1000-sheet Finisher (D588)
![]()
Use the screw removed in step 1 and the screw from the accessory box.
4. Open the front door [B]. Then pull the locking lever [C].
5. Align the finisher on the joint brackets, and lock it in place by pushing the locking lever.
6. Secure the locking lever ![]() x 1; knob M3 x 8) and close the front door.
x 1; knob M3 x 8) and close the front door.
7. Install the copy tray [D] ![]() x 1; knob M4 x 10).
x 1; knob M4 x 10).
8. Connect the finisher cable [E] to the main machine as shown above.

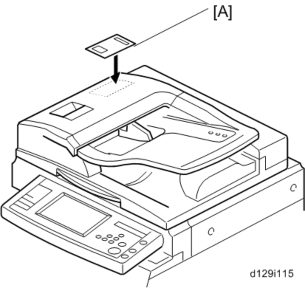
9. Attach the staple position decal [A] to the ARDF as shown.
10. Turn on the main power switch and check the finisher operation.