HOME PAGE | < Previous | Contents | Next >

1.1.2 FAX OPTION INSTALLATION PROCEDURE
![]()
Before installation:
If there is a printer option in the machine, print out all data in the printer buffer.
Push the operation switch to put the machine in standby mode. Make sure the power LED is off, turn the main switch off, and then disconnect the power cord and the network cable.
The copier must be connected to a properly grounded socket outlet.
1. Attach the serial number decal near the serial number plate of the mainframe.
2. For NA models, attach the FCC decal near the serial number plate of the mainframe.
3.
Rev. 11/15/2012 Fax Option Installation
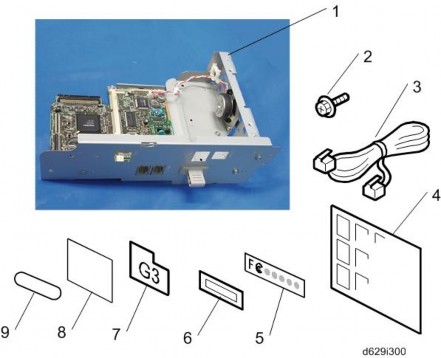
Fax Option Type 5002 (D629)
Fax Option Type 5002 (D629)
Fax Option Type 5002 (D629)
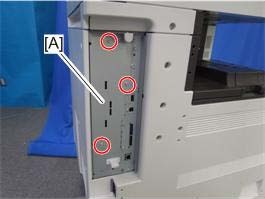
4. Remove the FCU cover [A] ( x 3).
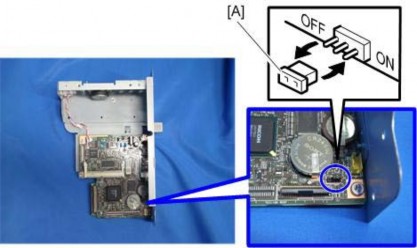
5. Remove the jumper [A] (set to OFF) and set it to ON.
The machine may issue SC819, SC820 if the jumper is not set to "ON" correctly. (Sometimes these SC codes are not issued.)
The following step is for units installed in Brazil only!
6. For installation in Brazil, move the jumper switch (CN613) on the FAX board so that the edge is anchored at “1”. (So that the middle pin and the “1” pin are covered.)
In its default position, the switch covers the middle and “3” pin.
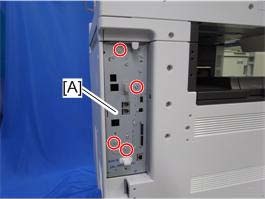
7. Install the FCU [A] ( x 4; use the three screws which were removed in step 3).
SM 3 D629
Fax Option Installation Rev. 11/15/2012
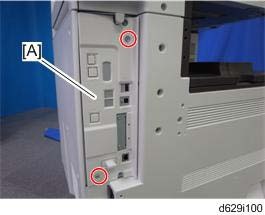
8. Reattach the controller cover [A] ( x2).
9. Connect the telephone cord to the "LINE 1" jack.
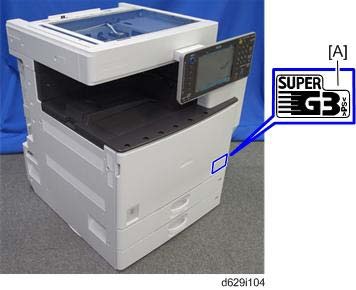
10. Attach the Super G3 decal [A].
11. Attach the Fax decal under the function key on the operation panel.
12. Plug in the machine and turn on the main power switch.
After you turn the machine on, if you see a message that tells you the SRAM has been formatted due to a problem with SRAM, turn the machine off and on again to clear the message.
13. Enter the "User Tools" mode and set date and time.
14. Do SP3102 in the fax SP mode and enter the serial number for the fax unit.
15. Enter the correct country code with SP1101-016 (NCU Country/Area Code Setting).
D629 4 SM