HOME PAGE | < Previous | Contents | Next >
4.8.2 TRANSFER BELT
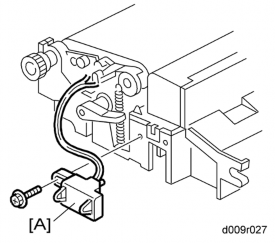
1. Transfer belt unit ![]() p.4-50)
p.4-50)

2. Connector [A] ![]() x 1)
x 1)

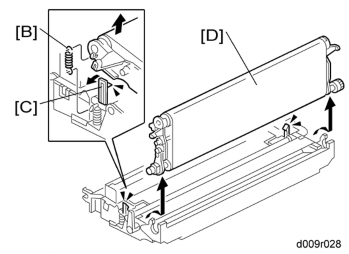
3. Remove the springs (front and rear) [B].
4. Release the hooks (front and rear) [C].
5. Transfer belt with rollers [D]
Transfer

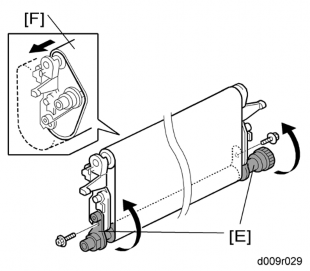
6. Lay the transfer belt with rollers on a flat clean surface, and fold the unit [E] to release the tension on the belt ![]() x 2).
x 2).

7. Transfer belt [F]
![]()
Avoid touching the transfer belt surface.
Before installing the new transfer belt, clean all the rollers and shafts with alcohol to prevent the belt from slipping.
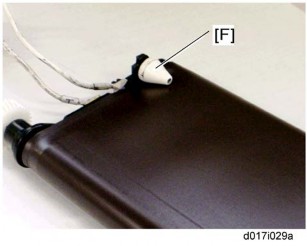
When reinstalling the transfer belt, make sure that the belt is under the pin [F].
To avoid damaging the transfer belt during installation, manually turn the rollers and make sure that the new transfer belt is not running over the edges of any of the rollers.