HOME PAGE | < Previous | Contents | Next >

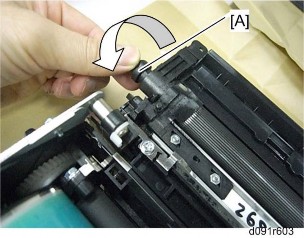
6. Rotate the development roller [A] in the direction of the arrow until the section you cleaned is no longer visible.
7. Repeat steps 5 and 6 until you have cleaned the entire surface of the roller.
8. Reassemble the PCDU and install the PCDU into the machine.
4.7.3 DEVELOPER
1. PCDU ![]() p.4-37)
p.4-37)
2. Open the PCDU. ![]() p.4-38 "Drum")
p.4-38 "Drum")
3. Development roller ![]() p.4-44)
p.4-44)
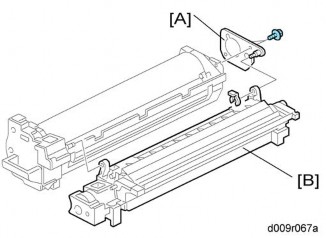
4. Joint bracket [A] ![]() x 2,
x 2, ![]() x 1)
x 1)
5. Development unit [B]
Development
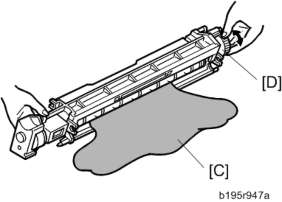
6. Tip out the old developer [C].
7. Turn drive gear [D] to ensure that no developer remains in the unit or on the developer roller.
![]()
Replacement and Adjustment
Replacement and Adjustment
Replacement and Adjustment
Dispose of the used developer in accordance with local regulations. Work carefully to avoid scratching or nicking the development roller.
8. Clean the development roller with a dry cloth.
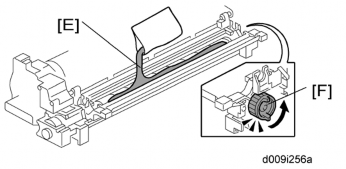
9. Pour approximately 1/3 of the developer [E] evenly along the length of the development unit.
10. Rotate the drive gear [F] to work the developer into the unit.
11. Repeat steps 8 and 9 until all toner is in the unit and level with the edges.
12. Re-install the development roller.
![]()
Make sure that the seals at the both sides of the development roller are set inside the case after you re-install the development roller.
Development
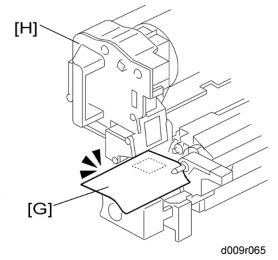
13. Place a piece of paper [G] over the toner entrance hole. This prevents used toner falling from the drum into the development unit during the TD sensor initial setting and interfering with the Vref setting (toner density reference voltage)
14. Secure the drum [H] to the development unit, to close the PCDU ![]() x 2).
x 2).
15. Install the PCDU in the machine and close the front and right doors.
16. Turn on the main power switch, and wait for the machine to warm up.
17. Do SP2801 to initialize the TD sensor and enter the developer lot number.
18. After performing the TD sensor initial setting, remove the sheet of paper from the PCDU.
Replacement and Adjustment
Replacement and Adjustment
Replacement and Adjustment