HOME PAGE | < Previous | Contents | Next >
4.5 LASER UNIT
![]()
Turn off the main power switch and unplug the machine before attempting any of the procedures in this section. Laser beams can seriously damage your eyes.
4.5.1 CAUTION DECAL LOCATIONS

Replacement and Adjustment
Replacement and Adjustment
Replacement and Adjustment
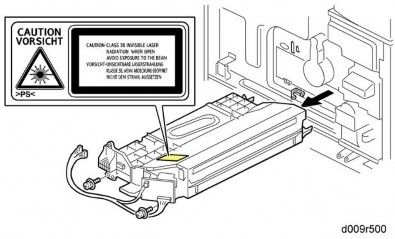
Two caution decals are located in the laser section as shown below. (See the next page for removal instructions.)
4.5.2 LASER UNIT

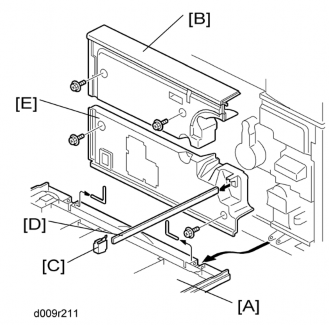
1. Open the front door.
2. Front door [A] (pins x 2)
Laser Unit
3. Upper inner cover [B] ![]() x 2)
x 2)
4. Glass cap [C]
5. Shield glass [D]
6. Lower inner cover [E] ![]() x 2)
x 2)

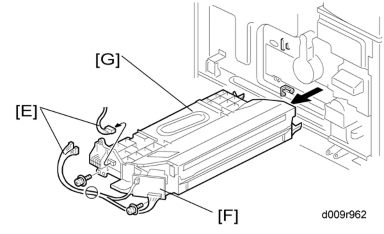
7. Laser unit connectors [E] ![]() x 3,
x 3, ![]() x 1)
x 1)
![]()
Do not disconnect the harnesses on the LD board [F] unless the LD unit has to be replaced. This board is precisely adjusted in the factory.
8. Laser unit [G] ![]() x 2)
x 2)
![]()
When sliding out the laser unit, do not hold the LD board. Hold the laser unit.
Replacement and Adjustment
Replacement and Adjustment
Replacement and Adjustment