HOME PAGE | < Previous | Contents | Next >
4.4.7 SCANNER MOTOR
1. Scanner rear cover ![]() p.4-11 "Scanner Exterior Panels and Operation Panel")
p.4-11 "Scanner Exterior Panels and Operation Panel")

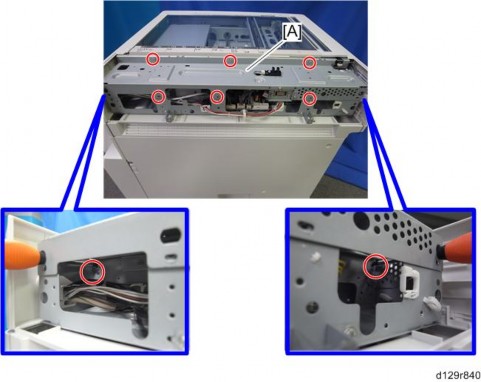
2. Remove the 8 screws of the scanner rear frame [A].

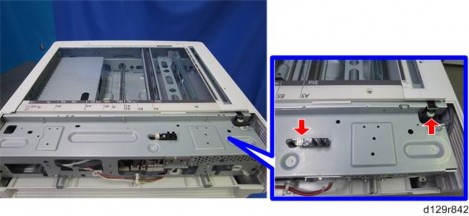
3. Disconnect the two connectors.
Scanner

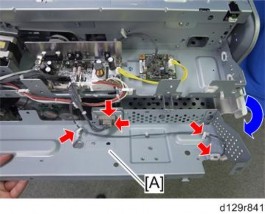
4. Pull over the scanner rear stay [A] and remove it ![]() x 2,
x 2, ![]() x 3).
x 3).
Replacement and Adjustment
Replacement and Adjustment
Replacement and Adjustment
5.
6.
![]()
After replacing the scanner motor, do the image adjustments in the following section of the manual ![]() "Scanning" in "Copy Adjustments: Printing/Scanning").
"Scanning" in "Copy Adjustments: Printing/Scanning").