Today would like to introduce to you a tutorial on blending sunny yellow. The colors are very impressive, the instructions are also quite detailed.
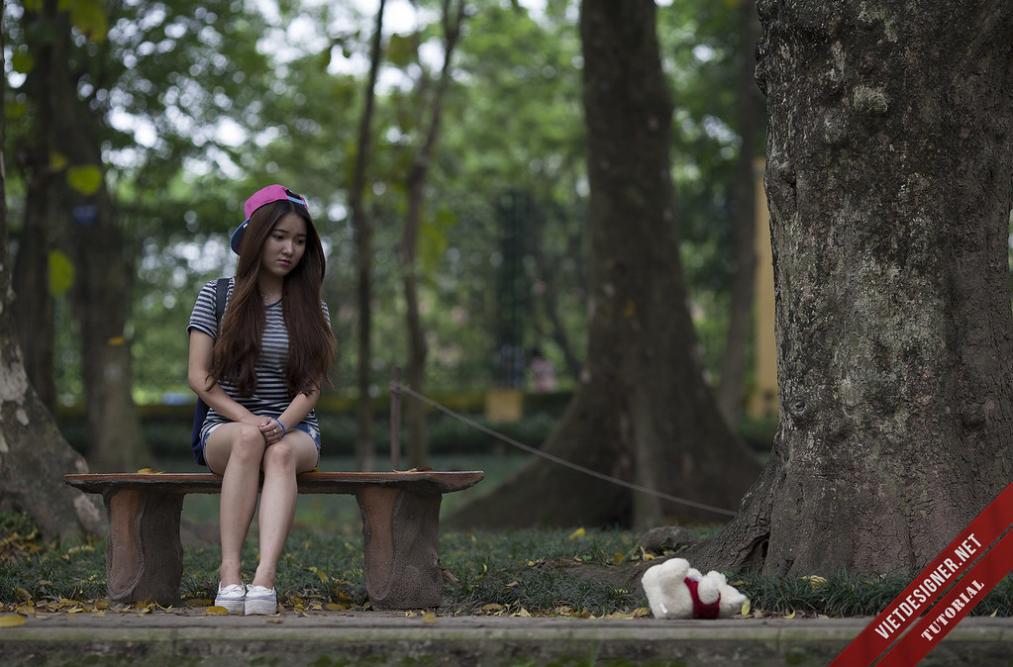
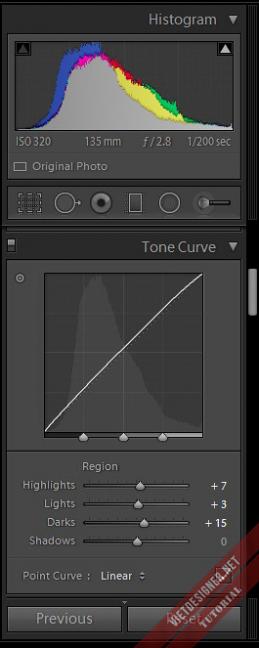
If you want to make this photo, first try to take a photo with a sunny composition, if not, then take a photo with bokeh. This makes the sunlight look more realistic than taking a photo in the background where the leaves are not clearly visible or where the background light adds fake light and it doesn’t look good! Ok! That’s the original photo stitching.
Next is the color blending stage : (In this color blending tutorial, the author has combined the two software Photoshop and Lightroom. If you do not have Lightroom software on your computer, you can go here to download).
Before starting this tutorial, you need to download some materials (including stock raw and Rays plugin).
The original picture looks like this:
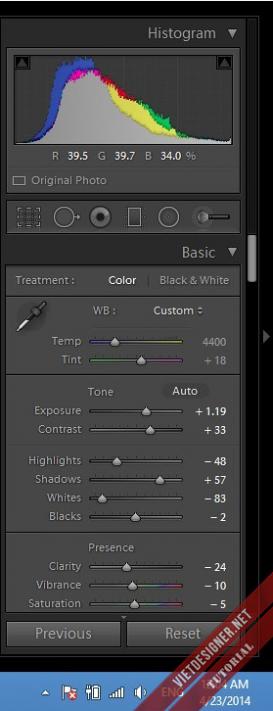
First, we put the photo into Lightroom and start dragging the light and dark in the BASIC panel.
As we can see: Leave the Temp as it is, no need to drag it yet.
Because the photo is a bit dark, I increased the Exposure first.
Then increase the Contrast a bit to give the image more depth. At this point, it doesn’t feel right at all. Because the highlight area is a bit bright, I pull it down a bit.
Next, to avoid the contrasy from making the shadows look dull, I increased it again
Still bright, reduce white again.
It doesn’t matter whether the black is reduced or not in this picture, because as I said earlier, the shadow I just saved can’t be pulled anymore (saying that but still lowering it to -2 ).
Clarity, this is to saturate the light and dark areas strongly or lightly, increase it to create strong contrast, low it is less so it smoothes the whole image, so to make this image a gentle image, I reduce it to The image is smoother.
The last thing is that my style is always vibrance reduced by 10 and saturation reduced by 5
Personally, I feel like reducing these 2 things like this makes it easier to pull the skin…that’s it.
After pulling it out like this:
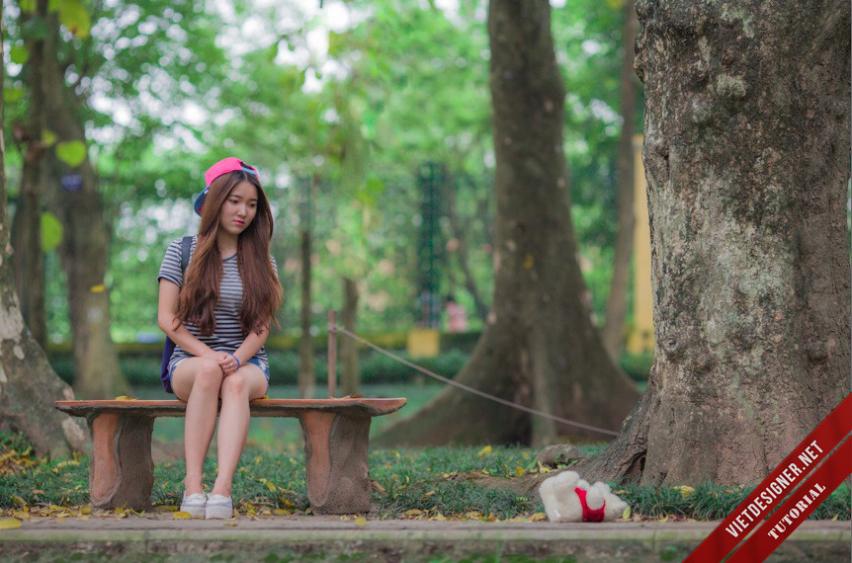
Seeing the light and dark like that is still not very happy, I don’t touch BASIC anymore but switch to pulling a bit on TONE CURVE , and how to pull this part depends on each person’s feeling, I pull it like that!
Next comes the color pull:
In the HUE channel, the colors RED and ORANGE are not used because they change the model’s skin and lip color. This makes the model’s skin look ugly, so you shouldn’t use it too much, (P/s: in this case only Okay, because there are many cases where you still have to pull…).
If you want yellow leaves, of course the Yellow and Green sections will have to be changed to yellow tones by dragging these two bars to the left. The AQUA color also has an effect, so drag the notes to make it less distracting!
Next comes Saturation,
As I said earlier, the lip color and skin color are on the top 2 color channels. In this photo, the model’s skin is a bit bright, so I reduced it, and each color is also reduced a little.
And I need to increase the yellow leaf color higher, so I increased both Yellow and Green channels higher, and how high it is depends on your eyes. I increased it like this!
The MAGENTA color in this case is the color of her belt, you can increase it if you want or not, it doesn’t matter.
Next, the LUMINANCE section increases the brightness of the color displayed in the photo.
I whiten my skin with the ORANGE channel and increase the inner lip color a bit with the RED channel because the sunlight is bright, so of course the Green and Yellow colors will definitely increase accordingly!
You can increase the aqua and blue ones, but you can also not increase them. I like to drag them around.
So the color is temporarily stable:

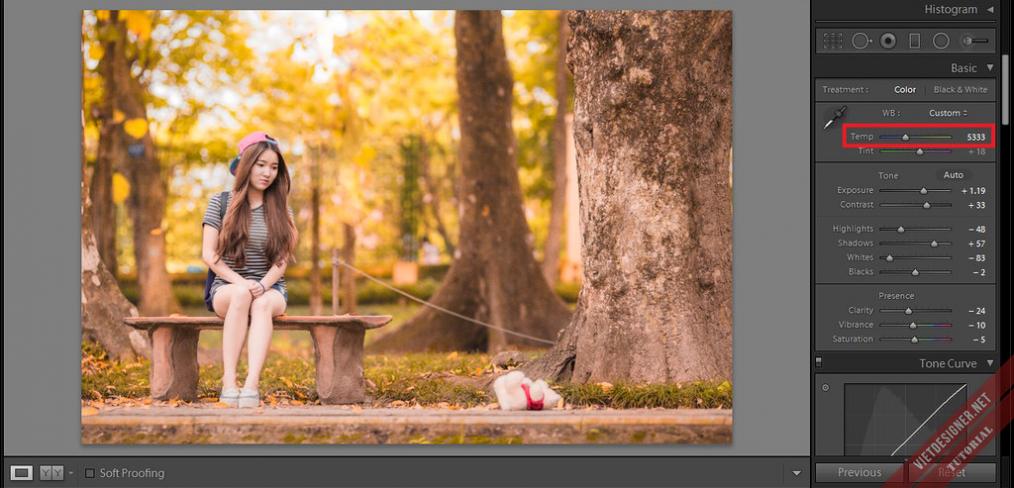
Thinking about it, I still don’t feel happy about being golden, I want more gold… Suddenly I remember: Ah! Haven’t increased K (temp) yet! Pull K again and see what happens.
Increase the output to about 5333 so it flashes red, orange, yellow…
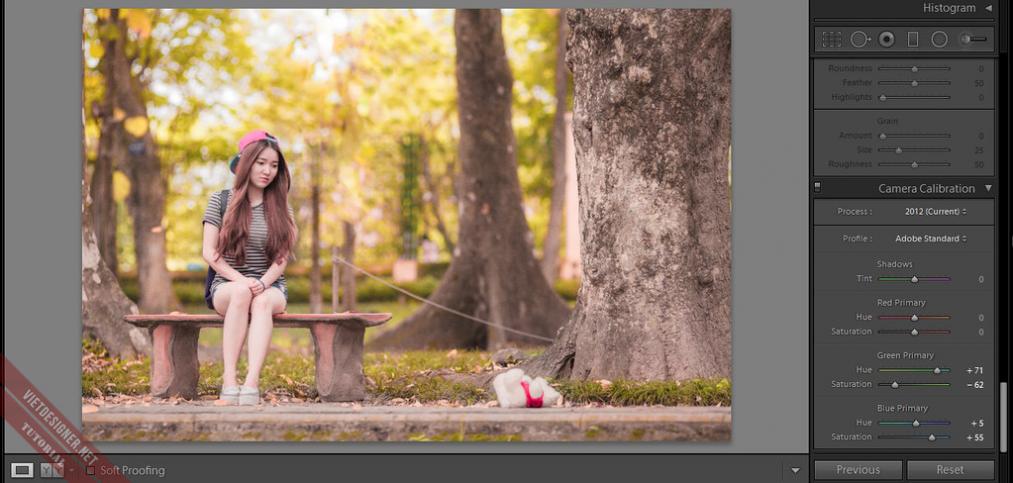
Seeing that the color balance is not quite right, I do this one more step.
That’s adjusting the correlation between colors, it’s just like the variables in the Curves section of Photoshop!
But it only has an additional Saturation section, like this picture right now it has too much red, so I drag Hue Green up to change the red color on the green area, and reduce Saturation to reduce the brightness of the red color.
As for Blue, after pulling Green, the gold is a bit low, so increase Saturation to increase the gold.
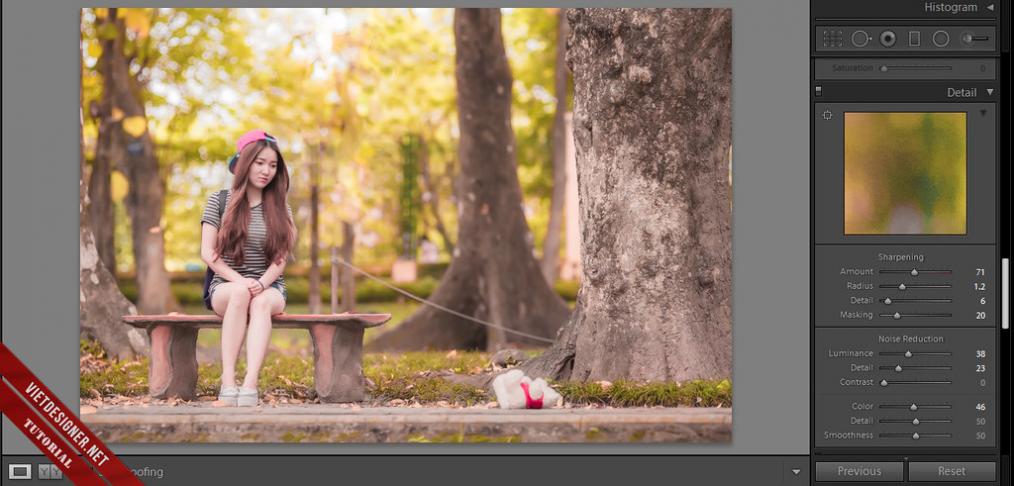
Next, looking at the photo, I saw a lot of noise, so I pulled the DETAIL like this: The way to pull it is on SHAPEN.. it’s Increase sharpness under NOISE… it’s to reduce noise, but how you pull it is up to you.
Note that if the image is small or a jpg image, stretch it a little to avoid the shape appearing or making it too smooth!
It’s like that!
Finally, fix the error of the lens to prevent black edges and it will be ok.
Select Enable…
Select MAKE as canon and it will automatically accept the wool!
Okay, so
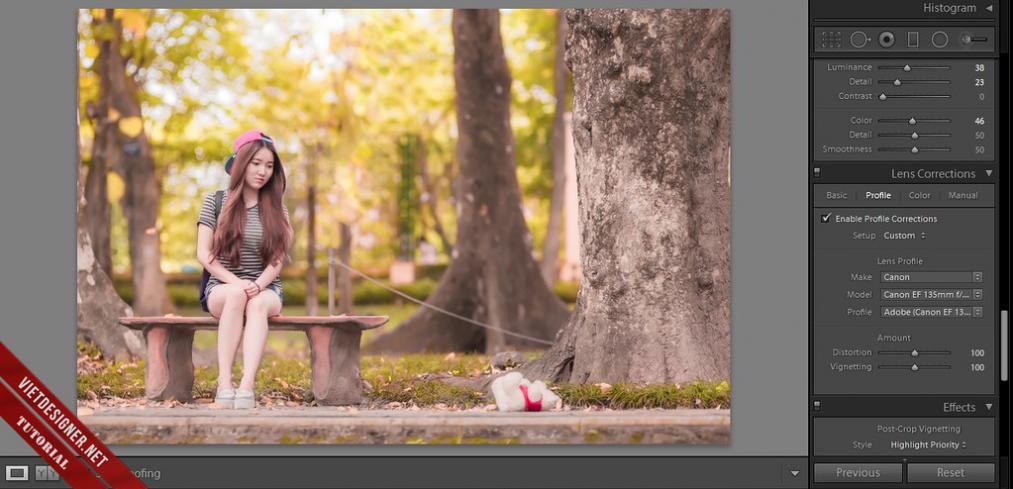
the steps in Lightroom are done, now export to Photoshop, everyone!
First, go to the shop and drag these 2 channels in Selective color for yourself…
Doing this will make the leaf color a little more red to make it more vibrant!
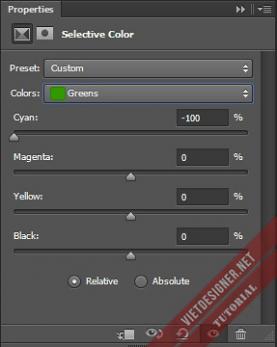
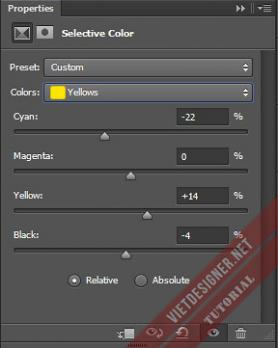
Ok….
Next multiply that layer! Then smooth the whole thing, because the image still has some errors in color saturation, zoom in and you will see the imperfection between blue and yellow…
Go to Filter > Blur > Surface Blur… parameters as shown, Just a little because there’s too much smoothness in the image, it’s very virtual…
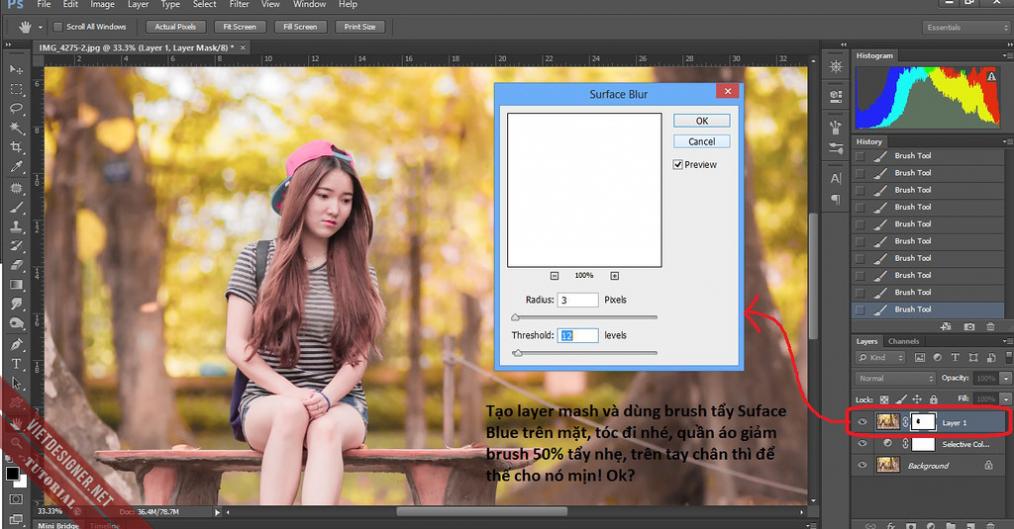
Then remember to use the brush to apply the mash layer and pull it back to the face, hair… (IT’S ALSO WRITTEN ON THE PHOTO)
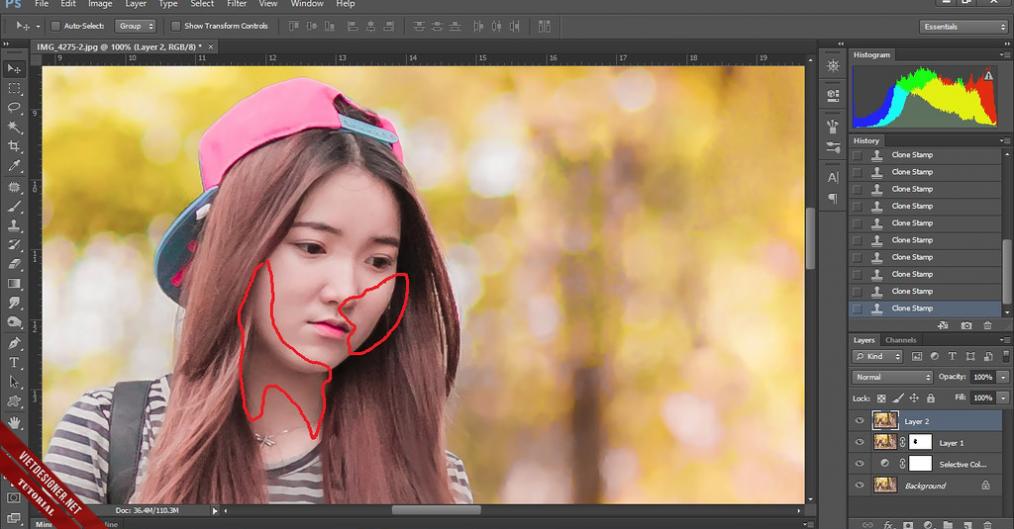
And next use the S tool for Stamp to smooth out the skin. This area is on the model’s face (as shown).
Done, now I use the Rays light plugin that I mentioned initially, you download and install.

We will have an interface like this after installation, it’s up to everyone to drag and drop, I made the parameters like this to look less fake!
And you create a mash layer for the layer with light and pull back the light to darken the face a bit because the light rays hit the face and you’re done…
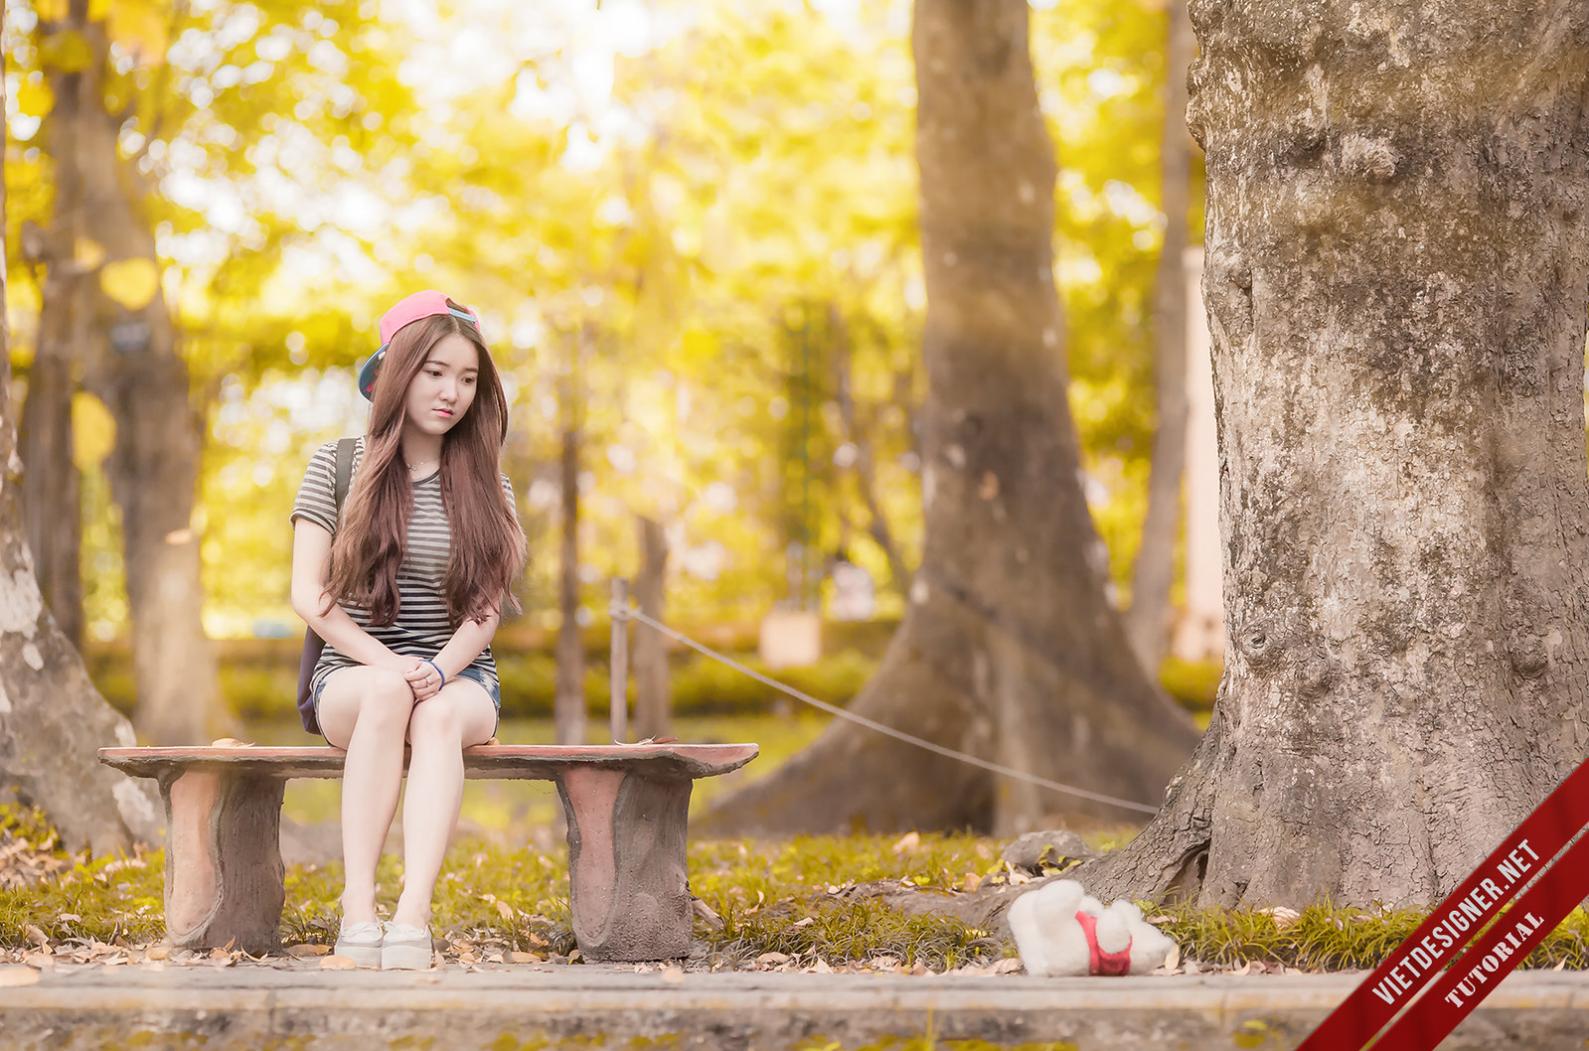
The final result for the tutorial is this:
The skin of this model still seems a bit pale. , on Lightroom you can drag it back to the ORANGE channel!