HOME PAGE | < Previous | Contents | Next >
11.2.1 PROCEDURE FOR RETRIEVING THE DEBUG LOG
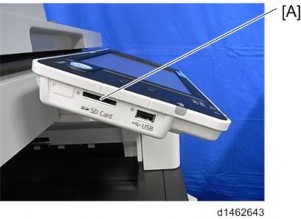
1. Insert the SD card into the slot [A] on the side of the operation panel.
2. Enter SP mode.
3. Set the start date of the log with SP5-857-101 (Start date of debug log output)
e.g.: March 28, 2013: input 20130328 (yyyymmdd)
Set the date three days earlier than the occurrence of the problems.
4. Set the end date of the log with SP5-857-102 (End date of debug log output)
e.g.: March 31, 2013: input 20130331 (yyyymmdd)
5. Execute SP5-857-103 (Get a debug log of all) to write the debug log to the SD card.
If the transfer is finished successfully, ‘completed’ is displayed on the touch panel display.
The approximate time it takes to transfer the debug log is as follows. Transfer time may be affected by the type or format of the SD card. (It is recommended that you format the SD card using the Panasonic SD Formatter (freeware)).
Controller debug log (GW debug log): 2 - 20 minutes
Engine debug log: 2 minutes
Operation panel debug log: 2 - 20 minutes
You can use the following service programs to obtains individual logs.
SP5-857-104 (Obtains the controller debug log)
SP5-857-105 (Obtains the engine debug log)
SP5-857-106 (Obtains the snapshot debug log)
SP5-857-107 (Obtains the control panel debug log)
The SD access LED flashes while logs are being obtained.
Retrieving the Debug Logs
6. “Finish” appears on the touch panel display, then remove the SD card.
If ‘failed’ appears on the touch panel display, turn the power off, and then recover from step 1 again.
Capturing the Debug Logs
Capturing the Debug Logs
Capturing the Debug Logs
The debug logs are saved with the following file names.
Controller debug log (GW debug log) | /LogTrace/machine number/watching/yyyymmdd_hhmmss_unique identification number.gz |
Engine debug log | /LogTrace/machine number/engine/yyyymmdd_hhmmss.gz |
Operation panel debug log | /LogTrace/machine number/opepanel/yyyymmdd_hhmmss.tar.gz |