HOME PAGE | < Previous | Contents | Next >
4.10.4 PAPER TRANSFER ROLLER
1. Open the paper transfer roller unit. (page 4-65 "Image Transfer Unit")
2. Paper transfer roller [A]

Replacement and Adjustment
Replacement and Adjustment
Replacement and Adjustment
4.10.5 PAPER TRANSFER ROLLER UNIT
Adjustment before replacing the paper transfer roller unit
Before replacing the Image Paper Transfer Roller Unit, set SP3-701-109 to "1" and switch the power OFF. Then replace the Image Paper Transfer Roller Unit and switch the power ON.
Replacement
1. Open the right cover. (page 4-65 "Image Transfer Unit")
![]()
2. After removing the clip ring and connector on the rear side, open the paper transfer roller unit, remove the clip ring at the front side, and remove the paper transfer roller unit [A] ( ![]() ×2,
×2,![]() ×1).
×1).
Note that the sizes of the clip ring differ on the left and right.
![]()
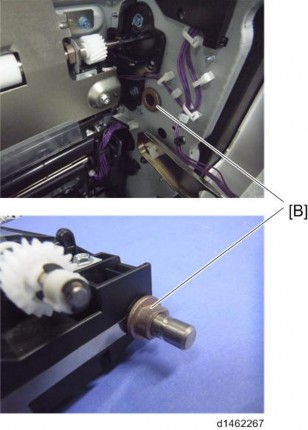
When attaching a paper transfer roller unit, first attach the stops [B] to the paper transfer roller unit.
Image Transfer Unit
Replacement and Adjustment
Replacement and Adjustment
Replacement and Adjustment
Image Transfer Unit