HOME PAGE | < Previous | Contents | Next >
4.10 IMAGE TRANSFER UNIT
4.10.1 IMAGE TRANSFER BELT UNIT
![]()
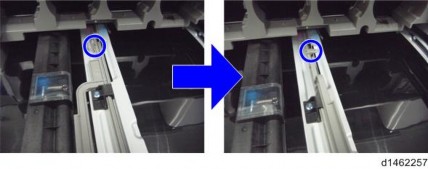
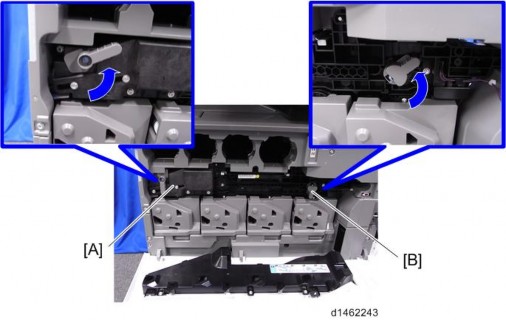
Note that if the two levers [A] are not pointing up, the image transfer belt unit cannot be inserted.
Replacement and Adjustment
Replacement and Adjustment
Replacement and Adjustment
Before you remove or attach the image transfer belt unit, remove the duplex unit and open the paper transfer unit.
Adjustment before replacing the image transfer belt unit
Before replacing the Image Transfer Belt unit, set SP3-701-093 to "1" and switch the power OFF. Then replace the Image Transfer Belt unit and switch the power ON.
Replacement
1. Open the front cover. (page 4-5 "Front Cover")
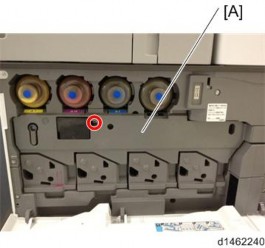
2. Image transfer front cover [A] ![]() ×1)
×1)
Image Transfer Unit
3. Release the lock [A] and open the right cover [B].
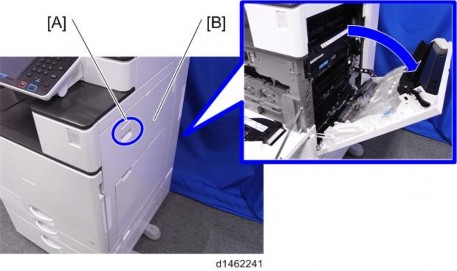
4. Pull the handle [A] and open the paper transfer unit [B].
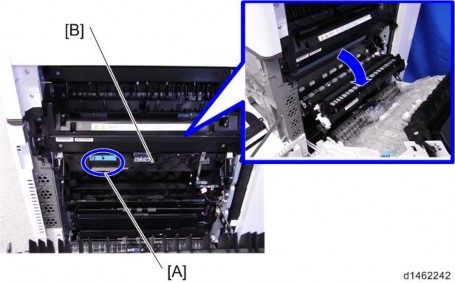
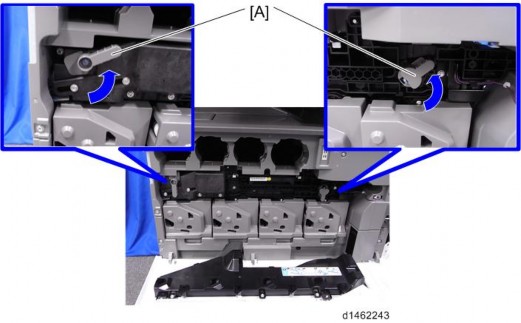
5. Release the ITB lock lever [A] and ITB contact lever [B].
Image Transfer Unit
Replacement and Adjustment
Replacement and Adjustment
Replacement and Adjustment
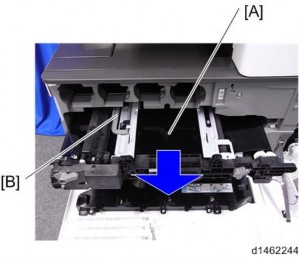
6. Image Transfer Belt Unit [A]
![]()
To prevent the image transfer belt unit from falling out, there is a lock mechanism. After pulling out the image transfer belt unit fully, lift the handle [B] to release the lock, and remove image transfer belt unit.
Locking mechanism by handle